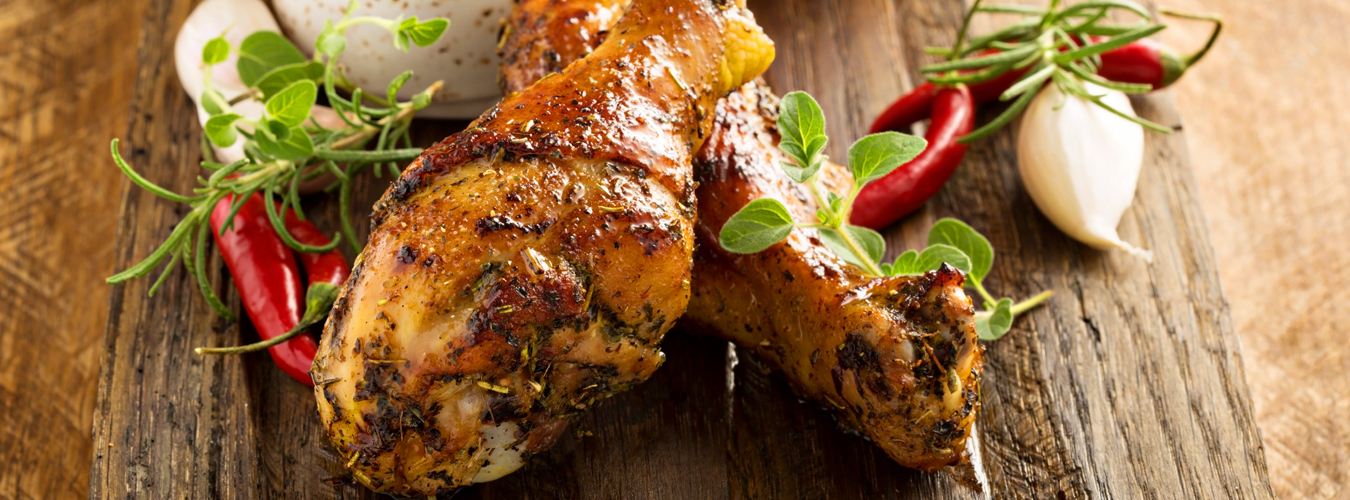
Nashville HOT Honey Chicken
Hot chicken is an institution here in Nashville and here's a great variation with the addition of hot honey. Hot honey, if you've never had it is amazing. This recipe is baked not fried, it's easy and more calorie friendly...
Ingredients
6 cups Panko Crumbs, you can substitute cornflake crumbs or bread crumbs, but nothing beats the crunch of Panko in my opinion
1/3 cup grated parmesan cheese
1 teaspoons paprika, smoked paprika is best
1 teaspoon onion powder
1 teaspoon garlic powder
1 teaspoon black pepper
2 large eggs, beaten
3 tablespoons Frank's Red Hot Sauce, there are so many other hot sauces out there you just can't beat Frank's
2 pounds chicken, I prefer boneless breasts, some people like thighs
HOT HONEY:
There are options here. Go slow, taste and if you need more heat add it. It's much easier to add heat than it is to take it away.
1/2 cup honey
2-3 tablespoons Frank's Red Hot Sauce
1-3 teaspoons cayenne pepper, go easy with this it gets hot really fast
1 teaspoon chipotle chili powder
1 teaspoon garlic powder
1 teaspoon onion powder
Preheat the oven to 425° F. Line a rimmed baking sheet with parchment paper.
In a food processor, combine the crumbs, parmesan, paprika, onion powder, garlic powder, and a pinch of salt. Pulse this mixture until you have the desired crumb consistency
Beat the eggs in a bowl, take a deep breath and add the hot sauce and chicken, and toss well to coat.
Dredge the chicken through the crumbs, I prefer doing this in a plastic zip lock bag so you get everything coated.. Place on the prepared baking sheet. You can do a double dip if you want more coating, just repeat the process, dip the chicken back through the eggs, then the crumbs. You may need more crumbs if you double dip. Place on the prepared baking sheet. Drizzle with olive oil. Bake for 20-25 minutes, until chicken is crisp and reads an internal degrees of 160 with a probe thermometer.
While the chicken is baking, make the sauce. In a sauce pot, warm together the honey, hot sauce, cayenne, chili powder, onion powder, and garlic powder, plus a pinch of salt.
Taste once, taste twice, and taste once again for preferred heat.
Drizzle the warm sauce over the chicken. If it cools and gets thick before you drizzle, just warm a bit.
Lemony, Buttery. Delicious Chicken Piccata with Warm Lemon Sauce
It's so fresh, so delightful, and SO positively yummy and fast to prepare. This Chicken Piccata is simply a chicken breast, dredged in flour, browned and topped with a buttery lemon sauce. It's not complicated to make, but it's always special to serve.
Ingredients
2 large Skinless Boneless Chicken Breasts – sliced horizontally into 1/2″ thick cutlets
1 cup All-Purpose Flour
1 teaspoon salt
1 teaspoon pepper
2 tbsp Olive Oil
2 large Lemons – 1/2 sliced thin and 1 1/2 juiced
1 clove Garlic – Chopped fine
1 1/2 cups Chicken Broth
3 tbsp Capers – Drained and Rinsed
4 tbsp Butter divided – 2 tbsp for sauce, 2 tbsp for pasta
1 lbs Linguine Noodles
Steps
Pre-heat oven to 225 degrees and put water on stove to boil for pasta
Slice chicken breasts horizontally or butterly them and flatten to about 1/2″ thickness and slice into cutlets. I've found an easy way to do this is to place them between parchment paper and pound with a cast iron skillet. This is very fast, I usually do this on the concrete patio or garage floor. Why? So I don't break the countertop. Try it, it works great.
Salt and pepper the chicken on each side and allow to sit for a few minutes. While the chicken is resting, heat a large saute pan to medium heat and add the olive oil.
Dredge the chicken in flour then pan fry for about 3-4 minutes on each side. When fully cooked, place chicken on a dish and place in the warm 225 degree oven on until ready to serve.
Slice 1/2 lemon into then slices removing any seeds. Juice the remaining 1 1/2 lemons, you should have 1/4 – 1/3 cup of juice.
Leave the bits from the chicken in the pan and add the chopped garlic to the over medium heat stirring occasionally for about 1 min until fragrant. Add chicken broth and bring to a slow boil, then add lemon slices. Allow to slow boil on medium to medium-low for about 5 mins stirring occasionally. The sauce will reduce and slightly thicken.
At this point, add the pasta to the boiling water. Linguine will take about 10 mins If using a different pasta, follow the directions adding to the water in order to time the pasta being al dente just after you complete the sauce.
After the sauce has cooked down add lemon juice and capers and allow to cook another 5 minutes stirring occasionally. Add 3 tbsp of butter and stir until fully melted and mixed in. Remove from heat and set aside.
Remove pasta pot from heat, drain pasta, return to the pot and add 2 tbsp of butter. Mix throughly.
To serve, add pasta to each plate with 2 cutlets then cover with sauce and a slice or two of lemon (for garnish)
🍋
🍋
🍋
#lemon #chickenbreast #foodie #food #yummy #yummyfood #chickenpiccata #lemonsauce #jancooksrealfood #jancancook #janspicx #lemonchicken #schnitzel #chickenschnitzel #giada #inagarten #pasquale
Lemony Chicken Skewers Infused with Herbs
It's Monday, we always eat healthy on Monday, so I have an awesome option for you.
Ingredients
For the marinade:
¼ cup olive oil
¼ cup lemon juice
zest of 1 lemon
2-3 garlic cloves crushed
2 tsp fresh thyme or 1 tsp. dried thyme
2 tsp fresh rosemary or 1 tsp dried rosemary
1 tsp dried oregano
1 tsp salt
1 tsp pepper
For the skewers:
4 large chicken breasts skinless, boneless, cubed
wooden skewers soaked in water
Steps
Combine all the ingredients for the marinade.
Slice the chicken into bite-sized chunks and place in a bowl. Pour over the marinade, cover and allow to marinade for at least 30 minutes but up to 24 hours, covered in the fridge.
Thread the marinated chicken onto soaked wooden skewers or metal skewers.
Heat an outdoor grill or stovetop grill pan then cook the skewers, turning every 3-5 minutes, until the chicken is cooked through and golden brown on all sides.
Or, fry in a skillet, or broil in the oven, so many ways to do this
Remove from the heat and allow to rest for 5 minutes before serving.
Serve with steamed vegetables sprinkled with salt and lemon pepper and rice. Minute Rice works well with this, and it's fast and easy. You can always add lemon and butter to the rice, toss in some of the leftover herbs, or save a few tablespoons of the marinade back before you add the chicken to use with the rice and put in a container in the fridge... whatever sounds good...
#lemon #lemonchicken ##lemonskewer #jancooksrealfood #yummy #yummyfood #rice #minuterice #veggies
Roasted Chicken with Lemon and Garlic
I love roasted chicken, it's so basic, so comforting, the house smalls amazing when it's baking, and once you've finished the prep, it's an easy meal.
This recipe has been around for years, it's and the flavor is indescribable. I've tweaked it a bit, adding more lemon and I often add apples tucked in at the sides of the pan. It's nice to offset the tart lemon with the sweetness of apples. It's your call, if you're a purist, just omit the apples. Don't be deterred by using a whole head of garlic, the flavor mellows when it's cooking, and it doesn't overpower the dish.
Ingredients
2 lemons + juice of an additional lemon
2-3 carrots split in half lengthwise
1 entire head of garlic
¼ cup (½ stick) unsalted
1 3½–4 lb. whole chicken
Kosher salt
Freshly ground black pepper
Fresh
Steps
Arrange a rack in the center of your oven, and preheat to 425°. Cut 2 lemons in half crosswise and remove any visible seeds.
Cut 1 head of garlic in half crosswise. (If it falls apart a bit, don't sweat it.)
Melt ½ stick butter in a small saucepan or microwave in a small bowl. Squeeze the juice of the additional lemon into the butter.
Place 1 3–4-lb. whole chicken on a cutting board (best to use a plastic one you can sterilize). A word on bird size. A 3–4-lb. chicken is pretty much the ideal size for roasting this way. Something a little bit bigger will work, but once you get much past 4½-lbs. it becomes harder to guarantee that the breast meat won't dry out in the time it takes the dark meat to cook. Pat the whole thing dry with paper towels. It's super important to get the chicken as dry as possible, which helps with browning.
With chicken breast facing up and legs pointing toward you, use a sharp knife to slice through loose area of skin connecting the leg and breast, making about a 3"-long incision. Continue cutting downward until you hit the joint that connects the thigh to the body, then stop (once you get through the skin, there’s not much there; if you are cutting through flesh, you’re too close to the breast). This exposes the leg joint, making it easy to tell if chicken is cooked. Repeat on second side.
Season every surface of chicken, including skin along backbone, inside cavity, under wings, and inside part of the leg you just exposed, with lots of salt and pepper. If you’re using kosher salt, it should take you 4–5 generous—as in, four finger—pinches, which will be around 4 whole teaspoons.
Transfer chicken breast side up to a large oven-safe skillet. Arrange lemon and garlic cut sides down in skillet around chicken.
Drizzle chicken all over with melted butter (mmmmmmm) and transfer to oven.
Roast until chicken is nicely browned and cooked through, checking for doneness after 45 minutes. To check, carefully remove skillet from oven (the handle is hot!), poke a knife into leg joints, and pierce the meat. If juices run clear, the chicken is done. If you see a rosy pink color, it needs more time. Continue to roast, checking every 5 minutes, until juices run clear. (If you’re not sure, you can also use the knife to lightly shred some of the meat along the thigh bone—the meat should look opaque and the fibers should separate easily.)
Let chicken rest in skillet at least 15 minutes before carving—this will help the juices in the meat to settle, and will also get it down to a temperature that is cool enough to handle with your bare hands while carving. Don't worry: It's a big piece of meat, so it will still be plenty warm by the time you serve it. Transfer chicken to a platter. Pour all of those wonderful buttery pan juices over top of the meat and serve with roasted lemon and garlic alongside. This dish is wonderful serve with rice with the pan juices poured over the rice as well.
Winner, winner, chicken dinner!
🐔
🐔
🐔
#chicken #roastedchicken #jancooksrealfood #yummy #yummyyummy #fowl #chickenbreast #drumstick
Pucker Up Sweet Cheeks, I've got a great lemon chicken recipe for you.
1 lb. chicken tenderloins
Joanna Gaines Magnolia Table Chicken Enchilada Casserole
This really is an absolutely delicious recipe, it's mellow, the flavors aren't overpowering at all, it's just warm, creamy, gooey perfection.
She made this yummy recipe on Season 2, episode 4 of The Magnolia Table. I watched that episode and knew I just had to make this and it did not disappoint. It's such a nice change from cumin infused, adobo type sauces, it's like the Mexican version of Fettuccine Alfredo. Well, okay, not really, but you get the idea...
Ingredients
Cooking spray
2 (10-ounce) cans mild green enchilada sauce
1 (10-ounce) can condensed cream of chicken soup
1 (8-ounce) container sour cream (1 cup)
4 cups shredded meat from 1 store-bought rotisserie chicken
1 (4-ounce) can diced green chiles
1 (14-ounce) bag grated mozzarella cheese (about 3 1/2 cups)
10 (8-inch) soft flour tortillas
1 tomato, chopped
½ cup chopped fresh cilantro 🤮
1 lime, cut into wedges
Cooked rice (preferably Mexican rice) and seasoned beans (preferably charro beans), warmed, for serving (optional)
Steps
Position an oven rack in the top third of the oven and heat the oven to 350 degrees. Coat a deep 9-by-13-inch baking dish with cooking spray.
In a large bowl, whisk together the enchilada sauce, condensed soup and sour cream. Spread 1/2 cup in the baking dish; set aside the remaining 3 1/2 cups creamy enchilada sauce.
In a medium bowl, combine the chicken and chiles (including any liquid from the can); set aside.
Sprinkle about 2 heaping tablespoons mozzarella on a tortilla, then add a heaping 1/3 cup of the shredded chicken and chiles. Tightly roll up the tortilla and place it seam side down in the prepared baking dish. Continue filling and rolling the remaining tortillas with 2 tablespoons mozzarella and a heaping 1/3 cup chicken mixture, placing the tortillas in the baking dish as they are filled, pushing the rolled tortillas as needed to fit in a single layer.
Pour the reserved creamy enchilada sauce over the filled tortillas. Bake for 20 minutes. Remove from the oven and sprinkle the remaining mozzarella on top. Bake until the cheese is melted, about 15 minutes. If you’d like it to be a bit browner in spots, you can pop it under the broiler for another minute or two.
Sprinkle enchiladas with tomato and cilantro and pass with lime wedges for squeezing on top. Serve enchiladas with rice and beans, if desired. Store leftovers in a covered container in the refrigerator for up to 4 days; reheat in a 300-degree oven.
🌮
🌮
🌮
#enchilada #jancooksrealfood #mexicanfood #enchiladas #food #burrito #mexican #foodie #dinner #foodporn #instafood #tacos #chimichanga #nachos #lunch #texmex y #foodstagram #fajita #foodphotography #chicken #margaritas r #mexicancuisine #chickenenchilidas #joannagaines #magnoliatable
Damn Good Air Fryer Chicken Legs
Fried chicken legs without the guilt? Bring it on...
I make these often and they're seriously yummy, easy to prepare with ingredients you have in your kitchen, well, maybe you don't have smoked paprika, it's good stuff, just put it on your grocery list 😀
- 6 chicken legs
- 3 tbs brown sugar
- 1.5 tsp kosher salt
- 1 tsp ground black pepper - I love McCormick's Smokehouse Black Pepper for this recipe, well I love this Smokehouse Pepper for a lot of recipes...
- 1 tsp ground mustard
- 1 tsp onion powder*
- 1 tsp garlic powder*
- 1 tsp smoked paprika
- ¼ tsp cayenne pepper
- 1 tbs vegetable oil
- Add all dry ingredients to a large zip top bag and shake to mix well. Add chicken to bag with vegetable oil and shake until all the chicken in coated.
- Let chicken marinate in refrigerator for at least 1 hour. The longer the better. Overnight is best!
- Preheat air fryer for 5 minutes at 380 degrees (F). Add chicken to air fryer and use “air fry” setting at 380 degrees (F) for 18-20 minutes, turning chicken halfway through. Internal temperature of chicken should be at least 165 degrees (
I'm a huge fan of Spice Way Onion and Garlic Granules. They are a large package, 8 oz., I transfer to a pint Ball jar to use. The flavor is amazing, so much better than the jars you buy in the store. I linked them above when listing the ingredients.
#friedchicken #chicken #foodie #food #instafood #foodstagram #foodphotography #yummy #chickenlegs #delicious #foodlover #foodbloggerr #sundaydinner #foodies #airfryer
Slow Cooker Chicken In a Bag, the most tender chicken you will ever make
Krista's Marinated Chicken
This is my friend, Krista’s favorite way to make chicken, it’s a must try. Works with any kind of meat!
Enjoy ~ Jan
1/2 cup olive oil
1/2 cup soy sauce - La Choy
6 Tbs. ketchup
1 Tbs. minced garlic
Cracked Pepper
Put above ingredients in plastic bag with chicken breasts, marinate all day in fridge, or overnight, turning frequently, then cook on the grill.
How easy is this!!!!
Perfect Chicken and Dumplings
Yes, these are wonderful. Stephanie, from So Simply Stephanie, has a post about how to make them, the lady knows her stuff.
DELICIOUS LEMON CHICKEN
I made Lemon Chicken last night, it was quick, easy to prepare and absolutely delicious. Hope you enjoy this as much as we did. ~ Jan
1 lb. chicken tenderloins
2 lemons
2 egg whites
1/2 Cup flour
salt and lemon Pepper Seasoning
Preheat oven to 375 degrees
Put a mixture of butter and olive oil in oven proof skillet, slice a lemon, add to butter mixture and heat.
Meanwhile, pat chicken tenderloins dry with paper towel, season with salt and lemon pepper. Dip in beaten egg whites, then put in large plastic zip lock bag, shake well and place in skillet with the bubbling butter oil mixture. Brown well on one side, turn and immediately put in preheated oven to finish. Don’t cover skillet. Bake for 15-20 minutes until chicken is cooked, take out of oven and squeeze juice of lemon over chicken and serve.
Enjoy, this is wonderful! ~ Jan
Amish Fried Chicken
I’m on a fried chicken kick this week and this Amish Fried Chicken is a recipe I’ve made several times with good results. The seasonings are really good, the dried marjoram gives it a different flavor.
This is the recipe I made, from Food.com with just a few adaptations to the spices. I used garlic powder instead of garlic salt, and also added a teaspoon of onion powder. I also added a teaspoon of paprika for a nice golden color. I also soak it overnight in sweet milk, I think that milk makes chicken more tender, and gives it a nice flavor.
This is so easy because you bake it instead of fry it, it’s really delicious. ~ Jan
Photo courtesy of Midwest Living
Mom's Fried Chicken in a Black Iron Skillet...
The food of your childhood is always the best, and my mother’s fried chicken was absolutely world class.
We had chicken every Sunday, and it didn’t come from a store, but from our own backyard. It was a gruesome task, dressing a chicken, but we were country people and lived off the land. The meat was amazing, you simply can’t get farm raised chickens now unless you find a grower and pay a premium price, but with a few tips as to how Mother made her chicken, I’m sure that yours will turn out very well.
The first thing she did was to soak the chicken pieces overnight in buttermilk. She always cut the breasts so that there was a “wishbone” and it was the most tender, coveted part of the chicken.
She would heat lard in a black iron skillet, which is a tricky thing, because iron heats so quickly, that when you put your chicken pieces in to fry, you turn it down to medium or even medium low, or your chicken will brown too quickly and by the time it’s cooked it will burn.
She would salt and pepper the chicken, wet from being soaked in the buttermilk, and then put it in a brown paper sack and shake it until coated, then drop it piece by piece into the hot fat.
Here’s how she cooked it, resulting in the best chicken you’ve ever eaten:
She always let her fat get really hot before putting in the chicken, if you don’t, it will stick to the skillet and the crust pulls away from the chicken.
She never put a lid on it when it was frying, this steams the chicken and results in a soggy, not crisp crust.
She turned it often, very often, like every 5 minutes, taking the wings and legs out first and blotting them on a folded paper sack, we didn’t have paper towels in those days.
She cooked the breasts for approximately 35-45 minutes until a deep golden brown, remember, keep turning
Gravy:
The best part, drain the skillet of all but 2-3 tablespoons of fat drippings, stir in 2-3 tablespoons of flour, salt, pepper and cook until a very light brown, then stir in milk, approximately two cups, stirring constantly so that it doesn’t lump. Today we use a whisk, she always used a wooden spoon. Cook until thick, add more milk if needed, or if the gravy seems thin, just cook it down to the right consistency.
Black iron continues to cook after it’s removed from the heat, you may need to add a bit more milk to the gravy before stirring.
And that’s it, the recipe for the best fried chicken you will ever eat.
Enjoy… ~ Jan
Old Fashioned Chicken Salad
Mother made old fashioned chicken salad with ingredients she had in her fridge. This doesn't have fruit or sour cream or nuts, like a lot of chicken salads today, it's just a basic old fashioned chicken salad and it's so good.
She always ground her chicken salad with a food grinder, I prefer just chunking it.
There isn't an exact recipe, you just adjust ingredients as you go along.
Cooked chicken breast
Hard Boiled Eggs
Chopped Green Onions
Diced Celery
Celery Seed
Pimentos (Mother didn't add pimentos, but my friend Jean does, and it's a nice touch)
Sweet pickle relish
Mayonnaise
Pepper
Just blend ingredients, adding enough Mayo to make it creamy, chill and enjoy. It's wonderful, great made with turkey, too...
Pioneer Woman's Buffalo Chicken Salad
I think Pioneer Woman is amazing, and her food speaks to me. Her Buffalo Chicken Salad looks like nectar of the Gods, and I just had to direct you to her site so you can see for yourself. She makes bleu cheese dressing with ranch dressing and throws in bleu cheese crumbles, how easy is that! The woman is amazing! Seriously!
Here's her link, check out her recipe. I snagged her picture from her site, have to give her credit for that, too.
Another winner from this talented lady and mother. I'm such a fan! ~ jan
Picture Source: Pioneer Woman
Crockpot Chicken in a Bag, Moist, Fall Apart Tender, BEST CHICKEN, EVER!!!!
This is so tender it falls off the bone. I've been making this recipe for years, and all of a sudden it's popping up everywhere online. It's so simple, and you can season it the way you want to make it your own recipe. Back in the day we used to call it "sticky chicken" because its so tender.
You just take a whole chicken, season it, put it in a Reynolds Cooking Bag, (the kind you put a turkey in at thanksgiving, but a smaller size for a chicken, or just use the big turkey bag if you can't find a small one) twist it shut with a twisty and put it in the crockpot, no liquid, nothing, don't worry it won't burn. Cook it on low for 8-10 hours, or high 6 hours and the chicken literally falls off the bone.
I lift the bag out of the crock, snip the end and drain the chicken stock to use later.
This is a win-win recipe, you will love it! Pinky swear you will.
Variations:
Season it with fresh herbs, stuff it with lemons, apple, oranges, any kind of fruit you want. Sprinkle ranch dressing on it, or taco seasoning, the possibilities are endless. I like it with just salt and pepper myself.
You will never make more tender chicken than this.
Enjoy!!! ~ Jan
Shredding chicken the easy way...
Crispy Oven Chicken Fingers
I have a husband that adores chicken fingers, it's one of his favorite ways to eat chicken. I'm always searching for a "healthy alternative" and I I've found just the thing with this recipe adapted from Country Living.
Ingredients
2 cup(s) Buttermilk
2 clove(s) Garlic, crushed
1 tablespoon(s) Hot-Pepper Sauce
1 teaspoon(s) Kosher Salt
1 teaspoon(s) Fresh-Ground Pepper
2 pound(s) Boneless, Skinless Chicken Breasts, cut into 3- by 1/2-inch strips
1 package(s) (7-ounce) Sesame Crispbread, such as WASA 6 tablespoon(s) Unsalted Butter, melted
Directions
Combine the buttermilk, garlic, hot-pepper sauce, salt, and pepper in a large bowl. Add the chicken, cover, and refrigerate for 2 hours or up to 12 hours. Heat the oven to 400 degrees F. Lightly coat 2 baking pans with oil and set aside.
Note: If you don't have buttermilk, regular milk works well for this. Sometimes I use a liberal amount of garlic powder instead of the fresh garlic, garlic salt works well, too.
Crush the crispbread into coarse crumbs and place the crumbs in a large, shallow baking dish, toss in the melted butter, and set aside. Remove the chicken from the marinade and coat with the crumbs. Place on the prepared pans and bake, turning once, until golden and crisp — about 25 minutes. Tips & Techniques Keep your work area neat: Place crispbread in a resealable plastic bag, and crush with a rolling pin or heavy pot.
Picture & Recipe Source: Country Living Magazine
Paula Deen Grandmother Paul’s Fried Chicken
Ingredients
- Salt and pepper, for seasoning chicken
- Crisco shortening, for frying
- 3 eggs
- 1/3 cup water
- 2 cups self-rising flour
- 1 teaspoon black pepper
- 1 (2 1/2 pound) chicken, cut into pieces
Directions
Heat shortening in a cast iron skillet to 350 degrees F.
Beat eggs with water in a small bowl. In a shallow bowl, season flour with pepper. Dip chicken pieces in egg mixture and then coat well in flour mixture. Carefully add to hot shortening, in batches if necessary, place lid on top of skillet, and fry until brown and crisp. Remember that dark meat requires a longer cooking time (about 13 to 14 minutes, compared to 8 to 10 minutes for white meat.)
Note: This is Jan’s tweak to this recipe, I always soak my chicken overnight in buttermilk, it makes it moist and tender and gives it a bit of a zippy flavor. You can use sweet milk, too – either way it just adds to the taste.
Recipe and Photo courtesy of Food Network
Paula Deen Lady and Sons Chicken Pot Pie
Ingredients
4 sheets frozen puff pastry
1 egg, beaten
4 chicken breast halves, or 2 cups leftover cooked chicken
Seasoned salt and pepper
2 tablespoons cooking oil
1/3 cup butter
2/3 cup all-purpose flour
1 quart heavy cream
1/4 cup chicken base (you buy this in a jar at the grocery store)
1 tablespoon minced garlic
1/2 small yellow onion, minced
1 cup frozen green peas, cooked
1 cup chopped cooked carrots
Pinch fresh grated nutmeg, optional
Special equipment: 4 (2-cup) individual baking dishes
Directions
Crust:
Preheat oven to 350 degrees F.
Cut each sheet of frozen puff pastry into 1-inch strips, 8 inches long. On a large cookie sheet, weave strips into a lattice large enough to cover each pot pie. Brush beaten egg onto each lattice square. Bake for 5 minutes, or until dough has risen and turned light golden brown. Set aside until ready to assemble pies. Leave oven on at 350 degrees F.
Filling:
Rotisserie chicken works well for this, if you’re in a hurry. or you can season your chicken with salt and pepper, and saute in the oil in a large skillet until thoroughly cooked.
In a large saucepan, melt butter and then slowly add flour, stirring until consistency of peanut butter, but not brown like a roux. This works best for me if I use a whisk, then add cream whisking continously so it doesn’t lump. Add chicken base, garlic, and onion and stir until thickened. Add peas, carrots, nutmeg, if using, and cut up chicken. Remove from heat. Fill 4 individual oven-proof bowls with chicken mixture and then top each with a pre-cooked lattice square. Bake for 5 minutes or until bubbly. Any remaining pie filling may be frozen.
Note: Use salt sparingly, as the chicken base is quite salty.
Recipe courtesy Paula Deen
Photo: Food Network