If Pioneer Woman approves of it, I’m on it!
Hope they are paying her the big bucks for the commercials, too. Go Ree!!!


If Pioneer Woman approves of it, I’m on it!
Hope they are paying her the big bucks for the commercials, too. Go Ree!!!
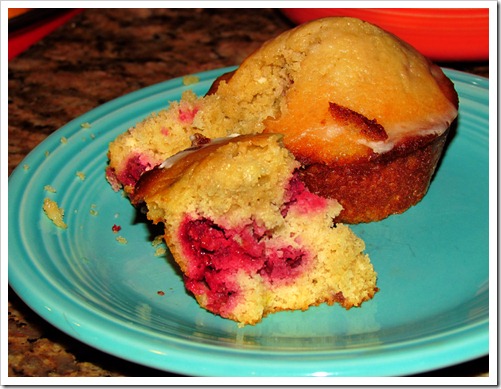

This recipe is from Williams Sonoma, but I tweaked it by adding a lemon glaze and more lemon to the batter. You will love these muffins, they’re light, lemony, and yummy!
Ingredients:
2 cups all-purpose flour
2 tsp. baking powder
1/2 tsp. baking soda
1/4 tsp. salt
1/4 tsp. freshly grated nutmeg – I omitted this
2 eggs
2/3 cup firmly packed light brown sugar
1 cup milk
6 Tbs. (3/4 stick) unsalted butter, melted
1 Tbs. finely grated lemon zest
I added the juice of a lemon to the batter, as well as the zest
1 cup fresh or frozen raspberries
Directions:
Prepare the muffin pan
Preheat an oven to 425°F. Line 12 standard muffin cups with paper liners. (I didn’t have liners, I just sprayed the muffin tins with Pam, it worked fine
Mix the batter
In a large bowl, stir together the flour, baking powder, baking soda, salt and nutmeg.
In another bowl, whisk together the eggs and brown sugar until blended. Whisk in the milk, butter and lemon zest. Add the egg mixture to the flour mixture and, using a rubber spatula, stir until just evenly moistened. Gently fold in the raspberries until just evenly distributed.
Bake the muffins
Spoon the batter into the prepared muffin cups, filling them three-fourths full. Bake until the muffins are golden brown and a toothpick inserted into the center of a muffin comes out clean, 15 to 18 minutes. Transfer the pan to a wire rack and let cool for 5 minutes, then turn the muffins out onto the rack. Let cool briefly and serve. Makes 12 muffins.
Note: I filled the muffin tins almost full, and used 12 tins. It worked great filling the tins completely, they crowned nicely and didn’t run over the edges.
Lemon Glaze
1 cup of sifted confectioner’s sugar
1 Tablespoon of fresh lemon juice
Lemon zest from the rind
1 tablespoon melted butter
1 Tablespoon milk
Put all ingredients in food processor and process until thin consistency. You want to spoon this on the muffins while they are warm, and let it run down the sides. You may have to adjust, adding a bit more milk if your glaze is too thick.
I put the muffins on a cookie drying rack that sits on paper towel, so that the excess just runs off.
These are such good muffins, perfect for a summer breakfast with fresh fruit.


We made this for July 4th, and it was absolutely yummy. Let it sit overnight, the flavors mellow, it’s totally light, refreshing and really simple to make.
3 bottles of Pinot Grigio
6 ounces of frozen lemonade concentrate, undiluted
6 ounces of frozen orange juice, undiluted
Orange Slices
Strawberries, Sliced
Peaches Sliced
That’s it, how easy is this? Just stir together in a large container, refrigerate overnight and enjoy.
And since everybody likes a different sweetness to their drinks, this was tart, so we just added a packet of two of Splenda to our glasses instead of adding sugar to the entire batch.
It was just perfect….
~ jan
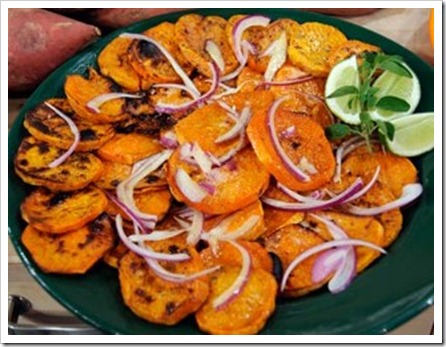

There is a little deli lunch place in Indiana, Maxine’s, and they have the most wonderful sweet potato salad. It is so unusual, it’s so yummy, and great for fall.
I don’t have their recipe, however, this was in the local newspaper, and it’s “supposedly” a good copycat.
Definitely a “must try” at my house.
Baked Sweet-Potato Salad with Vanilla-Maple Vinaigrette
4 large sweet potatoes
8 slices of double-smoked bacon
1 medium bell pepper, diced
2/3 cup celery,diced
4 to 5 green onions, thinly sliced on the diagonal
1/2 cup beer nuts, lightly crushed
1 tablespoon chopped fresh parsley
1 tablespoon chopped
1 tablespoon fresh thyme, chopped
Vanilla-Maple Vinaigrette
2 tablespoons hot water
3 tablespoons pure maple syrup
3 tablespoons champgne vinegar or white wine vinegar
1 shallot, finely chopped
1 tablespoon Dijon mustard
3 tablespoons vegetable oil
Preheat gill to medium high
Place sweet potatoes on the upper shelf of preheated grill and close lid. Roast for 45 to 60 minutes, or longer, depending on size, until just cooked and tender but not mushy when pierced with a wooden skewer. Let cool slightly too handle, peel, and cut into bite-sized pieces, 1 to 11/2-inch chunks. Cool Completely.
Grill bacon slices until crispy, remove from the grill and dice in 1/2 to 3/4-inches
In a large bowl, combine sweet potato, red pepper, celery, green onions,beer nuts, parley, rosemary and thyme. Toss well and set aside.
Vinaigrette:
Place vanilla bean and seeds in a bowl with hot water. Let sit 10 to 20 minutes.
Whisk together the syrup, vinegar, shallot and mustard. While continually whisking, drizzle in the oil to form an emulsion. Whisk in the vanilla mixture.
Pour the vinaigrette over te sweet potato salad and mix well to coat. Serve immediately.
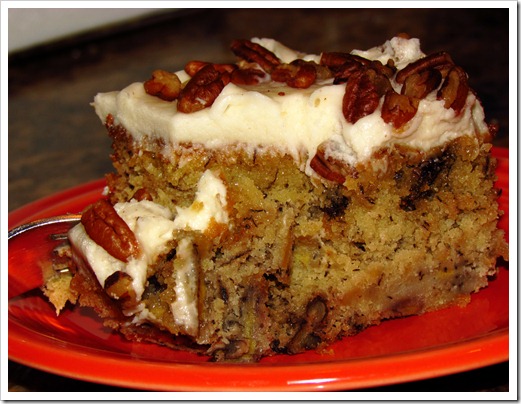

I made this last weekend when the family was home and it was a huge hit. I found the recipe on AllRecipes and it had 1000 positive reviews. I read all the tweaks, and ended up making the recipe pretty much like the original, except I baked it at 300°instead of 275°, and I added pecans to the batter as well. It took about an hour and twenty minutes to bake in my oven. This is a heavy, dense cake, reminiscent of banana nut bread, but better! I wish I would have weighed it, I would guestimate 7 lbs. The consistency reminded me of our much loved Elsah’s Landing Hawaiian Carrot Cake, another winner that I’ve made for my family for the past twenty-five years. You can read the recipe for the Carrot Cake by clicking here.
I did put the cake immediately in the freezer for 45 minutes as the recipe told me to do, but then I frosted it, covered it and left it at room temperature so that it would moisten. I would refrigerate this after 24 hours, since it has cream cheese in the frosting, but I think it’s best served if you bring the sliced pieces back to room temperature before serving, so that the frosting is creamy. This cake improves with time, every day it gets more moist.
This is such a great recipe, going into my Tried ‘n True Hall of Fame it’s so good. I did use buttermilk, some people didn’t, and I used the entire recipe for frosting as we like a lot of icing.
Ingredients
1 1/2 cups bananas, mashed, ripe
2 teaspoons lemon juice
3 cups flour
1 1/2 teaspoons baking soda
1/4 teaspoon salt
3/4 cup butter, softened
2 1/8 cups sugar
3 large eggs
2 teaspoons vanilla
1 1/2 cups buttermilk
I added a cup of chopped pecans to the batter, you can toast pecans if you like for a richer flavor
Frosting
1/2 cup butter, softened
1 (8 ounce) packages cream cheese, softened
1 teaspoon vanilla
3 1/2 cups powdered sugar, sifted
Garnish
1 cup chopped pecans
Directions:
Preheat oven to 275°. – I baked this at 300°
Grease and flour a 9 x 13 pan, I sprayed with Pam
In a small bowl, mix mashed banana with the lemon juice; set aside. I had 5 bananas, very ripe, that’s the secret, you want your bananas turning black, they have the best flavor. I used all of mine, I didn’t measure, I just used them.
In a medium bowl, mix flour, baking soda and salt; set aside. I sift all of these ingredients together.
Using a mixer, cream 3/4 cup butter and 2 1/8 cups sugar until light and fluffy.
Beat in eggs, one at a time, then stir in 2 tsp vanilla.
Beat in the flour mixture alternately with the buttermilk.
Stir in banana mixture.
Pour batter into prepared pan and bake in preheated oven for one hour or until toothpick inserted in center comes out clean. This is not long enough, even at 300° it took mine an hour and twenty minutes to bake and I have an accurate oven.
Remove from oven and place directly into the freezer for 45 minutes. This will make the cake very moist.
For the frosting, cream the butter and cream cheese until smooth.
Beat in 1 teaspoon vanilla.
Add powdered sugar and beat on low speed until combined, then on high speed until frosting is smooth.
Spread on cooled cake.
Sprinkle chopped pecans over top of the frosting, if desired, or you can mix the chopped nuts in with the cream cheese frosting.
You’re going to love this cake, it is totally awesome.

This great video from HGTV has some super ideas. Now I need to find those lemon/onion containers that hang off your shelf. Nifty idea!


My friend Barb, told me about how awesome Portillo’s Chopped Salad is. Portillo’s is a Chicago institution, a hot dog stand that was started in 1963 by Dick Portillo’s in a small trailer with no running water, and has now grown to 47 locations. Their chopped salad is famous, and rightly so. Oh, what a great summer recipe this is for all of you… The recipe is widely available online, this is how Barb makes hers…
Portillo’s Chopped Salad
1 head iceberg lettuce
1 – 2 heads Romaine lettuce, depending on size
1 small head red cabbage, minced or 1 bag sliced red cabbage, chopped
1 small red onion, finely minced
1 bunch green onions, thinly sliced
3 tomatoes, seeded and diced
2 c. ditalini pasta, cooked and cooled
1 lb. bacon, cooked and crumbled
1 c. gorgonzola cheese, crumbled (Amish Blue Cheese from Sam’s is awesome)
Vinaigrette dressing, bottled or homemade
Wash and dry the lettuces. Finely chop until the lettuce is in small pieces, this is the secret, you want this to be finely chopped, not large chunks.
Put in large salad bowl and add the remaining ingredients, except dressing, and toss to combine well.
Serve dressing along side the salad or pour on and combine just before serving.
Dressing:
Barb uses a Honey Mustard Vinaigrette, I’ve also read that Marzetti’s Sweet Italian Dressing is a dead ringer, Commenters also say that Aldi’s Grandesse House Salad Dressing tastes really similar. I also found a homemade recipe with positive reviews if you would like to try it.
This Italian Dressing is from the Chicago Sun-Times. It is similar to the dressing found on salads at Portillo's and Maggiano's restaurants.
1/4 cup balsamic vinegar
2 cloves garlic, peeled and minced
1 teaspoon sugar
1/2 teaspoon oregano
1/4 teaspoon salt
1/4 teaspoon fresh ground black pepper
1/4 cup olive oil
Place vinegar, garlic, sugar, oregano, salt and pepper in a blender or food processor.
While the machine is running, slowly drizzle olive oil through the blender top or feed tube until dressing is combined and emulsified.
Store in an airtight container in refrigerator for up to two weeks


You all know about my continuing obsession with Salad-In-A-Jar, and lately I’ve been eating Sam’s Spring Greens, hubby buys me two gigantic containers of it at a time.
And, I’m counting calories, and even though the bacon and dressing aren’t healthy, my salad came in at 350 calories, so that’s a good thing. And the bacon fat is soooo satisfying! *wicked grin*
I took this huge, and I mean huge pile of greens, added chopped red onion, and meanwhile I sautéed 2 strips of bacon. I measured 1 tablespoon of the drippings, added a packet of Splenda, salt, lots of cracked pepper, a tablespoon of white vinegar, brought it to a boil on the stove, put it in my favorite stainless steel bowl that was ma’s, then put a plate on top and let it sit for a bit to wilt.
Then I added the crumbled bacon, croutons and blue cheese crumbles and it was TO.DIE.FOR!!!
I’ve always adored wilted lettuce, and the only way this would have been better was if it would have had a chopped hardboiled egg added. But of course, if I would have doubled the bacon drippings and the vinegar it would have taken it to another level, but I didn’t do that…
Oh, SO good!!!
 I’ve been busy with other things lately, so I’ve been buying Fage Unflavored Greek Yogurt instead of making my own. I know, bad girl, bad girl…
I seriously adore Greek Yogurt, seriously. I eat it on baked potatoes, I make dips with it, I add Splenda and fresh berries, and now…
 I’m eating it with Jif Extra Crunchy Peanut Butter, and it is totally awesome! I take 1/2 or 23/ cup of Greek Yogurt, add 2 packets of Splenda, a tablespoon of Peanut butter, stir thoroughly and eat! O.M.G. ladies, it you are a peanut butter person, you will love this. Good for you, and under 200 calories. It’s a great snack! I’m also reading that you mix Greek Yogurt with Jello Cheesecake Pudding, the kind in the little four-packs. I haven’t tried it yet, but I’m hearing it tastes like real cheesecake. I’ll update you…
~ jan
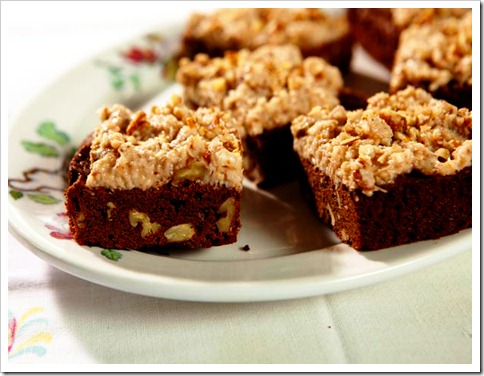
 Photo: Courtesy FoodNetwork
Trisha made these on her debut Cooking Show. What’s not to love, brownies that are reminescent of German Chocolate Cake. Oh my….
Ingredients:
Cooking spray
2 ounces unsweetened baking chocolate
1/3 cup solid vegetable shortening, such as Crisco
2 large eggs
1 cup sugar
2/3 cup all-purpose flour
1/2 teaspoon baking powder
1/2 teaspoon salt
1 cup chopped pecans
1 teaspoon vanilla extract
Preheat oven to 350 degrees. Pam an 8x8 pan and set aside.
Melt chocolate and shortening, either in the microwave or over a double boiler.
Beat eggs, add sugar and combine, then stir in chocolate mixture that you’ve slightly cooled.
Sift together dry ingredients, and by hand, stir in the chocolate/egg mixture. Then stir in vanilla extract and nuts.
Don’t overbake, bake just until a toothpick inserted in the center comes out clean, 25-30 minutes. Cool slightly, spread with frosting and cut in squares.
Coconut Frosting:
1 cup evaporated milk
1 cup sugar
4 egg yolks
1/2 cup butter (1 stick)
10 ounces fresh or frozen grated coconut, thawed
1 1/2 cups nuts (pecans, walnuts or almonds), finely chopped
1 teaspoon vanilla extract
Combine the evaporated milk, sugar and egg yolks in a saucepan. Stir with a wire whisk until the yolks are fully incorporated. Add the butter, melt, and bring to a simmer. Cook until the mixture thickens, 12 to 15 minutes, stirring constantly. Add the coconut, nuts and vanilla extract and let cool. Yield: 4 cups.
Trisha stirred the milk, sugar and egg yolks with the butter constantly. She said don’t leave them, you have to constantly stir them for at least 12 minutes until they thicken.
Source: Foodnetwork.com


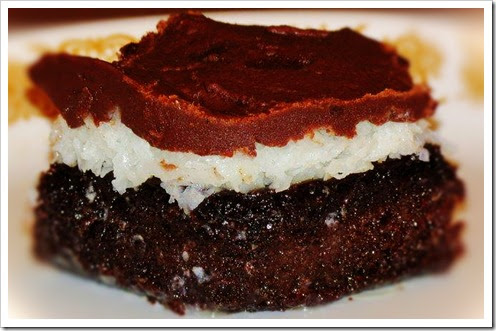
My friend, Diane, gave me this recipe for Mounds Candy Bar Cake. If you’re a Mounds lover, this ones for you! It tastes exactly like the candy bar…
1 devil foods cake mix
make as directed and bake in 9 x 13 pan
Filling:
mix in saucepan
1 cup sugar
24 regular marshmallows
1 cup milk
bring to boil and add 14 ounce ounces coconut
pour mixture over cake as soon as it comes out of oven and let cool
Frosting:
1/4 cup milk
3/4 cup sugar
1/4 cup butter
6 oz. package of chocolate chips
put these ingredients in saucepan and bring to boil and stir in chocolate chips, top with mixture and refrigerate overnight.
Note: Bring cake back to room temperature before cutting and serving for best results. I found the frosting to be difficult to cut when it was cold, but after it warmed up a bit it was perfect.
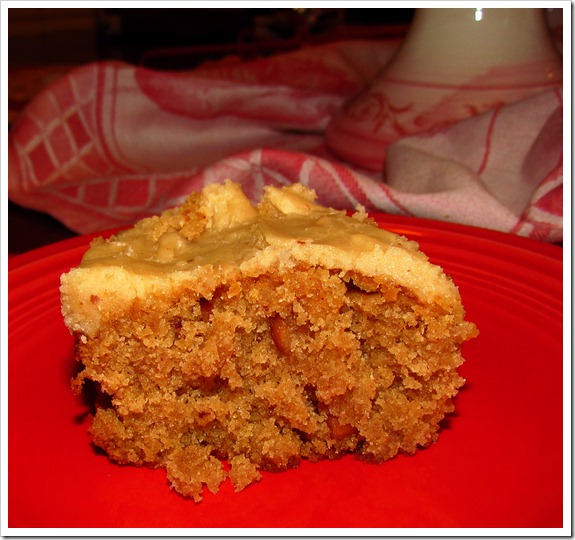

Pioneer Woman’s Peanut Butter Sheet Cake is truly wonderful, it’s a new family favorite at our house. It’s the same basic recipe as our Texas Sheet cake that I’ve made for years, with peanut butter substituted for the chocolate. I did tweak it a bit, and here are the results.

Ingredients:
2 cups Sugar
1 teaspoon Baking Soda
2 cups Flour
1 teaspoon Salt
2 sticks Butter
1 cup Water
1 cup Peanut Butter (I use Jif Extra Crunchy)
½ cups Milk
1 teaspoon Vanilla
2 whole Eggs
Icing Ingredients:
1 stick Butter
½ cups Peanut Butter
6 teaspoons Milk (this wasn’t enough milk, start with this amount and add more, a teaspoon at a time until you get the right consistency, it took me a few more teaspoons to make it smooth)
1 pound box Powdered Sugar (Sift this so that you get smooth frosting)
Preparation:
Mix sugar, baking soda, flour and salt in a large bowl and sit aside.
In a saucepan combine butter, water and peanut butter and bring to a boil. Pour over flour mixture, stirring constantly with a whisk so that it doesn’t lump.
Temper the wet ingredients by first adding the milk, then lightly beat two eggs and add them to the mixture with the vanilla.
The original recipe tells you to bake this in a 10x15 cookie sheet with sides or a jelly roll pan for 20 minutes in a 400 degree oven.
Our family loves thick cake so I bake it in a 9 x 13 pan, in a 350 degree oven for 35-40 minutes. I would never bake a cake at 400 degrees, that’s just too hot. If I baked this in jelly roll pan, I would still bake at 350 degrees and test after 20 minutes to see if it was done.
Icing Preparation:
Bring the butter, peanut butter and 6 teaspoons of milk to a boil in a saucepan. Whisk in the sifted powdered sugar, and add additional milk, a teaspoon at a time until the icing is a creamy consistency. Immediately pour the warm frosting over cooled cake.
Notes: This cake is much better the 2nd day, even better the 3rd day, as it gets more moist as it ages in the covered cake pan. I think I am going to make it using 1.5 cups of peanut butter in the cake batter next time to get a more intense peanut flavor, and hope that adding the extra half cup of peanut butter doesn’t mess with the consistency.
This would be amazing if you topped the icing with chopped peanuts or even better with chopped Reese Cups. This is such a great recipe, it’s going into my Tried ‘n True Hall of Fame.

This is simply the best banana cream pie you will ever eat. I get lots of people inquiring about my post for Lawry’s Coconut Banana Cream Pie, and while it is simply amazing, Mrs. Hulling’s recipe knocks it out of the ballpark. If you click on the image it will enlarge. My mother wrote out this recipe from a newspaper years ago, and we’ve made it countless times. This is a scrapbooked page I made using her handwriting.
")


A few years ago, my friend Veronica and I went to lunch at Red Geranium Restaurant in New Harmony, Indiana.
We were both dieting, as usual, and we ordered some silly rabbit food, and then we both positively salivated when the ladies at the next table were served thick pie shaped wedges of this wonderful meatloaf frosted with mashed potatoes. We were just drooling!
Veronica was able to obtain the recipe from a friend, but now that dish is no longer on the menu and we have both regretted not eating it. But we are going to make it, and when we do, we’re going to enjoy every delicious morsel of it and take pictures to document that we finally got to taste it.
The moral of this story, if you’re out with a girlfriend, forget the calories, if you really want something, just eat it!
~ jan

I didn’t realize that Greek Yogurt was just yogurt with the whey extracted. It sounds so exotic, but it’s a really simple process. It takes no equipment, just some time and the results is wonderful!
Before I start this post, I have to give credit to Paula at Salad-in-a-Jar, I followed her techniques, and she made it so simple.
The first time is the hardest, but it’s really not that difficult, ladies. I went to Amazon to price yogurt, 17.6 ounces of Fage Total Greek Yogurt is $6.99.
The weight of my yogurt was 18.8 ounces, and it cost me approximately $1.50 – I used a half a gallon of milk, and I paid $2.99 a gallon for the milk at Aldi’s. Now I did have an initial investment of $1.69 for a tiny single-serve container of Fage Unflavored Yogurt, but I’m not counting that, because I will never have to buy this again, as I can save a couple of teaspoons of each batch when I make more.
To make yogurt you need a half a gallon of non-fat milk and 2 teaspoon of live yogurt culture. Buy unflavored non-fat yogurt and look on the side of the container to make sure that it has live yogurt cultures. I bought Fage, I’ve also heard that Dannon non-fat has live yogurt cultures, as well.
I have an 8 cup measuring bowl, so I poured 8 cups of milk into the bowl and put it in the microwave to heat to a temperature of 175-180 degrees. This is much easier than doing it in a saucepan on the stove because you don’t have to constantly watch it. Paula said that it took 17 minutes in her microwave, in mine it took 18 minutes, 20 seconds to reach a temperature of 175 degrees.
 I have a Polder Digital Thermometer which makes it really simple to tell what temperature your milk is, but a candy thermometer would work just as well.
I started putting my thermometer into the microwave and testing at 16 minutes, I repeated this several times as I had never done this before and didn’t want it to get too hot. The next time I do this I will know how long it takes and it will be much easier.
It looked like this when I took it out of the wave.

You need to let this sit and cool to a temperature of between 110-120 degrees, it will take about 30-45 minutes to reach this temperature. I was anxious to get on with the process, patience is not a virtue for me, so as soon as the thermometer registered 120 degrees I was ready to proceed. I whisked in 2 level teaspoons of the Fage Unflavored yogurt and went to the next step.
This is where it got tricky for me, I didn’t know how to keep my yogurt at 100 degrees. I preheated my oven to 170, as low as my temperature allows, for less than a minute, and my temperature had already risen to 110 degrees, so I opened the door until it backed off to 100 degrees. I left on my oven light, sealed my mixing bowl of yogurt with aluminum foil, wrapped it in a towel and put it in the oven to “ferment.” Some ovens can be set to 100 degrees, if you’re one of the lucky ones that has that feature this would be much easier to regulate.
It takes anywhere from 6-12 hours to make yogurt, the longer you leave it, the more sour it gets, and I like it mild so I checked mine after 6 hours, and it wasn’t gelatinous, so I put it back into the oven and pulled it after 8 hours. It still seemed thin, and I was pretty skeptical at this point, but I whisked it, covered it and put it in the refrigerator overnight.
A lot of people ferment their yogurt overnight, but I made mine mid-day, as I didn’t know how to regulate the temperature. I found that my oven stayed at a pretty consistent 105 degrees with the light on, occasionally it would start creeping up to 108 and I would panic and open the door until the temperature backed off to 100 degrees.
This morning I took the yogurt out of the fridge, it still seemed runny, I didn’t whisk it again, I just poured it into my makeshift strainer. You need a really fine mesh boullon strainer for yogurt, they are pricey $60 on Amazon, but you can pick them up for $30+ on eBay, but I don’t have one so I had to make my own.
I have a strainer that sits over the sink, it’s wide, so I think it takes less time to strain, I lined it with a tea towel, and then put several folded layers of paper towel on top of the towel, as I didn’t want to yogurt to touch the tea towel and let it strain.

I quickly realized that I didn’t actually need the towel, I used an old one, it looked icky, so I just removed it and it worked fine to let the yogurt drain on the layers of paper towel. You can also use cheesecloth for this, but then you have to wash it, paper towel is easier, you just toss it.

You can see that the yogurt has gotten really thick, look at the difference between picture 1 and picture 2, I let it drain for almost 3 hours.
Then I put it in mother’s old stainless steel bowl, my very favorite thing in the kitchen, but you’ve all heard before about how much I love this old bowl, and you can see how thick this is. You could slice it with a knife, it’s so thick.

Then I whisked it, and it turned into this fluffy, wonderful yogurt. Some people add a bit of skim milk at this point to make it even creamier, but I want it really thick, so I didn’t add milk back in.

I’m going to have a scoop of this on a baked potato tonight with some fresh chives from my garden. Oh so good!

I put it in my Ball jar and the finished product yielded a little over two cups. I’m amazed by the fact that it reduces so much, but you’re taking out all of the liquid (whey) which some people use for different things, they use it instead of water for cookies veggies, for homemade bread, some people even water houseplants with it.

And here’s the weight, you’re probably thinking “this is a lot of work,” but it seriously isn’t, once you figure out how to do this, it’s going to be really simple.

If you’re interested in this, Paula has a video, explaining it all. You can access it here.
Note: Some recipes called for powdered milk to give added protein and make it richer. I was going to put it in, but I noticed a notation on salad-in-a-jar website that said she no longer does this, as she likes the texture better without it, so I left it out.
It’s healthy, it’s good for your gut, it’s cheap, it’s totally natural, it’s Yogurt!!!!!!!

John baked Deanna her Hershey’s Perfectly Perfect Chocolate Cake last night for her birthday today. This is the ultimate chocolate cake, fudgy, moist, it’s the wonderful chocolate cake we all remember from our childhoods, and it is perfect! My buddy V told me about it a few years ago, I made it for the family, we we all adored it, and it’s now one of our favorites.
And tonight she requested Pioneer Woman’s Chicken Fried Steak with mashed potatoes, gravy and biscuits. Oh, be still my heart![]()
Happy Birthday Deanna, I wish we were with you to celebrate wth you. Your father-in-law is absolutely salivating at the thought of that chicken fried steak!
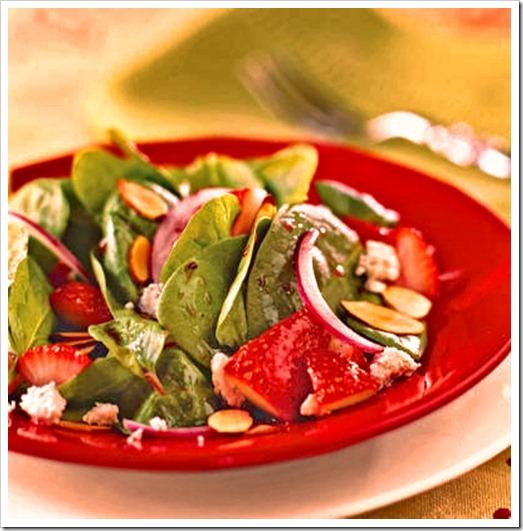

This recipe is serious stuff, the thickest, yummiest, best salad dressing you will ever eat. My friend Ramona gave the recipe to me years ago, and it’s delightful. This dressing is nectar of the gods, pinkie swear it is. You will love this!

I have modified this by using Splenda instead of sugar. You can add nuts and fruit to your greens, strawberries, grapes, mandarin oranges, feta cheese, slices of grilled chicken breast is good, too, and it’s wonderful with just onion and mushrooms. It’s the best salad dressing I’ve ever tasted. Enjoy ~ jan
Poppy seed dressing:
3/4 C. (sugar) Splenda -I cut this back a bit, i think 3/4 cup of Splenda is too sweet, so I use a heaping half cup of Splenda
1 t. dry mustard
1/2 C. chopped onion
1 t. salt
1/3 C. balsamic vinegar
1 C. mazola oil
1 1/2 T. poppy seeds - always store poppy seeds in fridge, they get rancid easily, if you have them open in your pantry they are probably rancid, throw them out and buy fresh.
To make dressing:
Whisk together all ingredients until you can no longer feel the sugar grains (because they have dissolved in the liquid) and the whisk leaves a trail in the thickened mixture.
Makes about 3 cups, so you will have leftover dressing.

It is the color of molasses, and after it’s refrigerated it’s as thick as molasses, it’s just incredible.
NOTE: When I make this, I find it necessary to blend dressing ingredients in my food processor to get the silky smooth, honey like consistency. If you just whisk it, sometimes it’s a bit gritty. I add my ingredients and just pour the oil thru the tube until it is incorporated, don’t overmix it or it will be foamy. You can also do this in the blender, just don’t overblend it. It should look like the above picture when it’s finished.

It fits perfectly in a pint jar. I like to use jars because you can spoon out the amount you want, and since I’m a FoodSaver Fruit Jar Sealing Fanatic, I always seal mine in the fridge to keep it fresh.
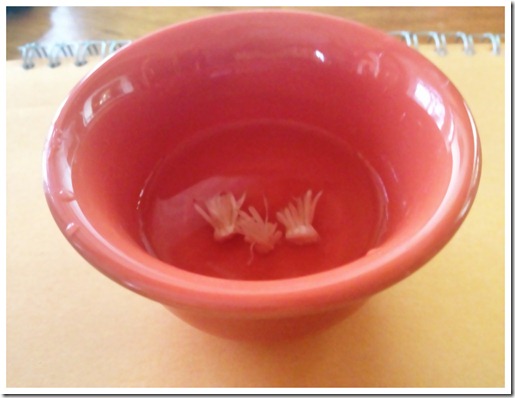

I’m fascinated by this concept from DIY. I found it here and decided to try it. What you are looking at are three scrawny green onion roots. You just put them in water in a sunny place, change the water every few days and watch them grow. I have mine on my computer desk in the sunroom with a western exposure. Here’s more pictures from another blogger who was successful with it.
I’m pretty skeptical but I will be fun to see if it actually works.
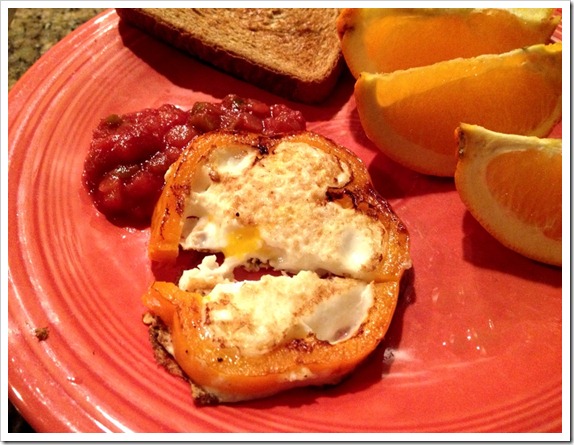

Isn’t this a great idea, kind of like “toad in a hole” but with a yellow pepper ring instead of toast. I saw this idea a couple of weeks ago, but I can’t remember where so I can’t give credit to the original poster, but it worked great and was really yummy. I microwaved my pepper slice for a minute to soften it, then broke the egg in it to cook. I flipped mine, but next time I’m going to cover it with a lid so the top cooks without flipping.


If you’ve never been to Kalyn’s Kitchen website, you’ve missed out on some really great South Beach recipes. I’ve been a fan for years, and last week when I saw her recipe for Slow Cooker Beef & Refried Bean Chili, I knew I had to try it. The problem was I didn’t have all the ingredients, and I’m not a fan of cumin or mexican oregano, so I adapted hers, and it came out amazingly well. A different take on tomato based chili, this one is a keeper. So thanks for the idea Kalyn. I’ll link to your original version at the end of the post.
I only used 1/3 pound of ground sirloin, yes that’s right, just 1/3 pound, and it was enough, but of course you can add more meat if you want. I also didn’t add the lime juice, but I did squeeze a fresh lime on my portion, I actually prefer it without the lime.
And yes, those are pickles, I’ve eaten pickles with chili since childhood, no peanut butter sandwich for this old girl, just give me some pickles. ;o)
Ingredients:
1/3 lb. ground sirloin
1 large onion, diced
3-4 large cloves of crushed garlic
1 teaspoon salt
1 teaspoon pepper
1/2 teaspoon red pepper flakes
1-2 Tablespoons of chili powder
1 can of Trader Joe’s refried black beans with jalapenos
1 can of light red kidney beans, drained
1 can of dark red kidney beans, drained
1/2 box (2 cups) beef broth
1/2 jar (1.5 cups) salsa
1 can diced tomatoes (I think next time I’ll use Rotel and kick it up another notch)
Brown ground sirloin and onions, stirring in garlic at last minute. Drain and add to rest of ingredients, simmer in covered pot for 30-45 minutes, or you could put this in a slow cooker on low for 3-4 hours.
It was thick, spicy and delicious. I always make tomato based chili, so this beef broth based one was really different. I loved the refried beans to thicken it, it was just a super recipe. Be sure and compare mine to Kalyn’s, hers looks wonderful. Oh, so GOOD! I’ll be making this healthy chili again and again…
~ jan
Adapted from a recipe from Kalyn’s Kitchen


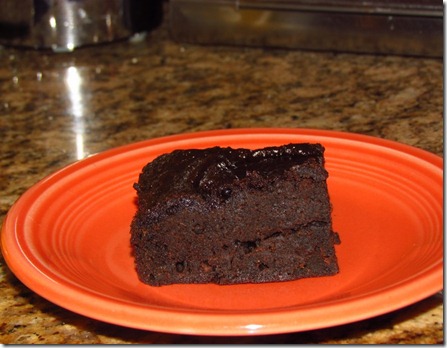

I have a technique for you this morning. I’m a fan of thick brownies, really thick ones like you get at the specialty bakery shoppes. I don’t like thin brownies spread out in a 9x13 pan, I want them fat. I used to bake in a 9x9 pan, sometimes in an 8x8 pan, and I got pretty good results, but I found the best way to bake them is in a 9x5 loaf pan. They take longer to cook, but the results are worth it, thick, dense brownies. I do the same thing with our old family favorite, Rice Krispie Treats. I’ve bought them at Starbucks, they taste pretty much like the ones I make, but theirs are very thick. So I made a batch in a loaf pan, then I turn them on a cutting board and slice them. Voila, thick Rice Krispie Treats, and a lot less expensive than the ones at the Bucks.
Give this technique a try, I think you will be impressed with the results.
~ jan
BTW, the brownie you are looking at is a low fat, lower calorie version. Just take a brownie mix, stir a can of pumpkin into it, and an egg. No water, no oil, just those three ingredients. The result is rich, ooey gooey low-cal brownies without the fat. Yes, you can see the specks of pumpkin in my picture, but you don’t taste it, pinky swear you don’t, it just tastes like chocolate. They aren’t iced either, the tops get gooey if you cover them and let them set overnite.
You can make the same recipe using a cake mix, just use pumpkin and any flavor of cake mix, I like spice a lot, I don’t even use an egg, some people do, I just mix the pumpkin with the cake mix. You may think it’s too dry, just keep mixing, it will turn to batter. Here’s a link to how it’s made with lots of reviews. It’s a good thing ;o)
And back to those Rice Krispie Treats, I was on another blogger’s site today, Krissy’s Creations and she made Brown Butter Vanilla Rice Krispie treats. I think my family would love them, here’s her link if they sound as good to you as they do to me…
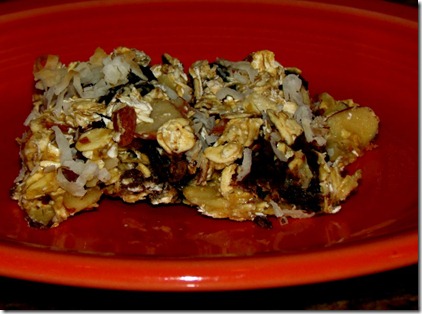

I made these granola bars a few days ago, and it literally took me 5 minutes. Using condensed milk really simplifies this recipe and the results are excellent.
I omitted the butter, and instead of putting them in a pan, I patted them out into a rectangle on my SiloPat baking sheet, baked them for 20 minutes, and they turned out perfect.
Ingredients
3 heaping cups quick oats old fashioned oats
1 (14 ounce) can sweetened condensed milk
2 tablespoons butter, melted 1 cup flaked coconut
1 cup sliced almonds
1 cup miniature semisweet chocolate chips
1/2 cup sweetened dried cranberries (I used raisins instead)
Directions
Preheat oven to 350 degrees F (175 degrees C). Grease a 9x13 inch pan.
In a large bowl, mix together the oats, sweetened condensed milk, butter, coconut, almonds, chocolate chips and cranberries with your hands until well blended. Press flat into the prepared pan.
Bake for 20 to 25 minutes in the preheated oven, depending on how crunchy you want them. Lightly browned just around the edges will give you moist, chewy bars. Let cool for 5 minutes, cut into squares then let cool completely before serving.
Adapted from a recipe by Allrecipes.com

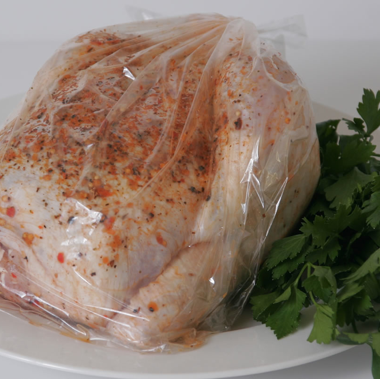
This stuff is nectar of the gods! I used this marinade for chicken, and pork, you are looking at the pork chops in the picture, I used my FoodSaver to pull a vacuum on this, so that I didn’t have to marinade for hours.
I tweak the recipe a bit, using Splenda instead of sugar, and I increase the garlic powder and add onion powder. Sometimes I substitute pineapple juice for water, it’s a very forgiving recipe.
Ingredients
1 cup soy sauce
1 cup water (can substitute pineapple juice)
3/4 cup white sugar (I use 3/4 cup granular Splenda
1/4 cup Worcestershire sauce
3 tablespoons distilled white vinegar
3 tablespoons vegetable oil
1/3 cup dried onion flakes (I use 2 teaspoons onion powder)
2 teaspoons garlic powder (I increase this to a tablespoon)
1 teaspoon grated fresh ginger (I omit the ginger, I’m not a fan.
Mix all together, stores well in the fridge. So simple, and so good.


This stew is so good and so hearty, it’s simple comfort food at it’s best. I’ve made this same recipe for more years than I care to remember, and it always turns out perfectly.
2 lbs. stew meat
1 large onion, diced
1 large can crushed tomatoes
1 box beef broth
16 oz. bag of baby carrots, cut in half on the diagonal
4-5 large cubed potatoes, preferably yukon gold
1 bag frozen peas
salt and pepper
optional: a bottle of red wine instead of the beef broth (cabernet sauvignon works well)
Put the stew meat, onion, crushed tomatoes, and beef broth in a large oven proof casserole, salt and pepper to taste. You can brown the beef if you like, I usually don’t. Bake, covered, in a preheated 350° oven for two and a half hours.
Put on top of stove, add carrots and simmer fifteen minutes. Then add cubed potatoes and simmer an additional 20-30 minutes, checking for doneness so they don’t get mushy. At the end of cooking time, pour in the bag of peas, turn off the heat, taste to correct seasonings and sit aside. So easy to make and better the next day.
Optional: We like stew made with red wine, so I sometimes substitute the wine for the beef broth.
Note: When you take the stew out of the oven, if you need more liquid, add another cup or so of beef broth before you add the carrots. Mine is usually thick enough that I don’t need to add a thickening agent, but if you want your liquid thicker, after the veggies are cooked, mix up a slurry of 1/4 cup cornstarch in 1/2 cup water, and add it until you get the consistency you like.

It’s that time of year again, and we’re all looking for Super Bowl Party appetizers. This winning recipe for Chili Dogs is easy to make and extremely guy friendly.
INGREDIENTS:
1 can (12 oz) Pillsbury® Grands!® Jr. Golden Layers® refrigerated biscuits
10 cocktail-size hot dogs
1/3 cup chili without beans
1/4 cup finely chopped onion (1/2 medium)
1/4 cup shredded Cheddar cheese (1 oz)
1 egg
1 tablespoon prepared yellow mustard
DIRECTIONS:

We had chicken and waffles for Christmas brunch this year and they were amazing. My youngest son and his wife, Ryan and Lindsay, are huge fans, and they thought it would be great to have a southern Christmas meal.
He used Ina Garten’s recipe for Oven Fried Chicken which was so good and so easy. You just brown your chicken, and finish cooking it in the oven on a rack, it was so crispy, you would never have known it was cooked in the oven.
The waffle recipe was from King Arthur Flour,Classic Buttermilk Waffles, light, fluffy, the batter was extremely stiff, I thought it wasn’t going to work, but oh was I ever wrong, they ware the best waffles I’ve ever had. We made them at home this past month, and stored the leftovers in the fridge between sheets of waxed paper in a gallon sized baggie to reheat in the toaster. Super recipe.
To serve the chicken and waffles, you put them on the plate, pour on the maple syrup and then you top the syrup with a few shakes of Tabasco. I was really hesitant, as I’m a hot sauce lover, but not on syrup, and Tabasco would never be my hot sauce of choice, but the combination of salty/sweet/vinegar/hot was perfect.
If you’re looking for something different for brunch, give this a try. You will be talking about it for weeks afterward, it’s that good.


I make the most amazing corn chowder, it’s adapted from an old Betty Crocker Cookbook from the 70’s. It’s a big recipe, I never cut it down, leftovers are great, and you can give it to family and friends, it reheats beautifully, too.
5 large potatoes, cubed and cooked in salted water (do not overcook, this will only take about 10-15 minutes for them to cook).
8 cups milk (part half and half is awesome, whole milk is good, 2% milk is acceptable, but skim milk is not rich enough)
1 large onion,diced
1 lb. bacon
3/4 cup flour
2 cans cream style corn
1 bag frozen corn
shredded cheese, chopped scallions and crumbled bacon for garnish
While potatoes are cooking, saute bacon in large skillet. Remove when crisp, drain on paper towels and crumble.
Put onions in bacon drippings and cook until tender. Remove onions with slotted spoon and put 3/4 cup flour into drippings, stirring constantly. I usually take this off the burner, as it thickens really quickly. Then I stir in 2-3 cups of the milk, and put it back on the burner for a minute or so, whisking constantly. Meanwhile put the remaining milk in the microwave and nuke it until it’s warm. If you put cold milk into warm drippings, it can curdle, so always warm everything. I warm the bag of frozen corn as well.
Put the 2 cans of cream style corn, the bag of warmed frozen corn in a large stockpot, add the onions, drain the cooked potatoes, add them, and I use a strainer to add the flour mixture to the ingredients in the crockpot, as you don’t want any lumps from the flour. Add salt and pepper to taste, I usually add 1-2 teaspoons of salt and a teaspoon of pepper. Heat until thick, but not boiling.
I served it with this great cornbread, quick and easy and delicious.

Note: The drippings from a pound of bacon is not too much, don’t decrease the amount of bacon grease, this is a really big recipe, and you need that much to flavor it. I sometimes add 2-3 tablespoons of butter as well, if I’m making it with 2% milk to give it a richer flavor.