Little Italy's Best, Maggianos’ Famous Baked Ziti Recipe

by 👩‍🍳 Cooking With a Southern Vibe in Music City USA 👩‍🍳, February 16, 2022


It doesn't get better than this, a famous recipe, from a famous restaurant and you can make this in your own kitchen.  It's straightforward, easily accessible ingredients, not hard to prepare and the result is ah-mazing..  It doesn't get better than this, pasta lovers...

Their story began in Chicago, Illinois in November of ’91 when Maggiano’s Little Italy opened the doors of its first location on the corners of Clark Street and Grand Avenue. The dishes were simple, authentic classics, many of them coaxed out of Italian grandmothers, mothers, and aunts whose ideas of a recipe were a pinch of this and a sprinkle of that. What happened next, as they say, is history.

The restaurant was successful from the very beginning. Eager diners sometimes waited hours to celebrate family-style over Italian–American cuisine, reminiscent of a Sunday night visit to their grandmother’s house -- or as they say in Italy, nonna’s casa! These delicious dishes paired with great service, generous portions and a warm atmosphere kept our guests and their families coming back for more.

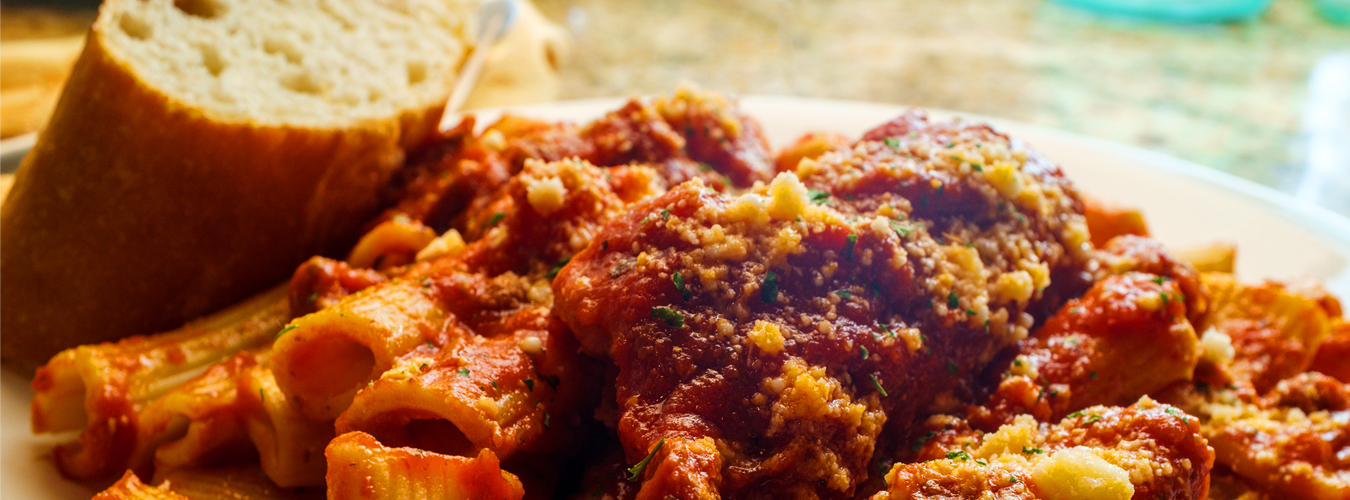
Their Baked Ziti is the most requested of all their recipes.  And you can make this in your own kitchen.  I love doing this, but then I'm a cook.  I love the process from the prep to the finished product and for me, it's a joy, being in the kitchen and I hope that by sharing these wonderful recipes it will be a joy for you as well.  It's not that difficult to make a wonderful meal, just break it down into steps, turn on some amazing music and cook!

16 oz ziti pasta
20 oz canned or fresh marinara sauce - they prefer Rao's
2 oz olive oil
1 oz butter
1 lb ground Italian sausage
1 oz chopped basil
2 Tbsp minced garlic
8 oz shredded Mozzarella
1 cup white wine
3 Tbsp grated Parmesan
12 oz can of diced tomatoes
1 basil sprig

Steps

Place ziti Pasta in boiling water and cook as stated on the back of the packaging or until your desired al dente. Place the Olive Oil into a heated sauté pan over medium-high heat and cook the Italian sausage.

Once the sausage is almost cooked, add the garlic and continue cooking for approximately 30 seconds. Add the white wine and bring to a simmer, reducing the wine until almost completely dry.

Lower the heat to medium, and add the diced tomatoes, marinara sauce, butter and chopped basil. Remove from the heat, and add the pasta and half of the Mozzarella. Then toss to blend.

Transfer to the baking dish and top with the remaining Mozzarella and Parmesan cheese.

Place underneath a broiler or in a convection oven for approximately 2-3 minutes until cheese is bubbly and golden brown. Garnish with basil sprig and serve immediately.

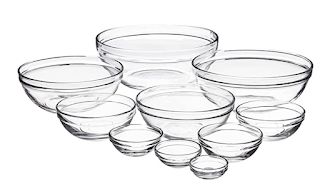
If pretty Italian stoneware is your thing - here's a link to this two piece set.  And I'm the queen of justification, you can make this at home, buy this pretty stoneware set that you will use for years and it won't cost you as much as one meal in an Italian restaurant. 


👩‍🍳
👩‍🍳
👩‍🍳
#ziti #pasta #bakedziti #italianfood #zitilover #food #foodie #pastalover #zitipasta #dinner #homemade #foodlover #italian #foodphotography #genovese #comfortfood #delicious #napoli #mozzarella #cheese 


I make the BEST Gourmet Shop Oatmeal Cookies you ever put in your mouth, for real....

by 👩‍🍳 Cooking With a Southern Vibe in Music City USA 👩‍🍳, February 15, 2022


These aren't some little cute, fun little one bite cookies.  Nope, these are the real deal, the big fat chewy, decadent ones that you pay a fortune for in a gourmet cookie shop.   The kind of cookie that makes your eyes roll to the back of your head when you bite into one.  The kind of cookie that you promise yourself you will only eat half of, but you never do, you eat two or three because they're so delicious you can't stop yourself. They're plump, moist, chewy, cookies, filled with such yummy goodness that whoever is lucky enough to be in your kitchen when you pull these out of the oven will absolutely love.

While other people are over there going crazy over chocolate chip cookies, yours truly has never been that girl.  I'll take a great oatmeal cookie any day of the week over a chocolate chip. And yes, of course I have a killer recipe for chocolate chip cookies, but that's for another post.   

Finding the right balance of ingredients in a fat cookie that's moist, but never dry, is not an easy feat,  But never fear, look no longer, these are the most wonderful, most decadent morsels of mouth watering cookie goodness that you will ever put in your mouth. Pinky swear they are...

Ingredients

¾ cup unsalted butter, softened to room temperature
1 cup light brown sugar,
6 Tablespoons granulated sugar
2 eggs
1 Tablespoon vanilla extract
1 tablespoon molasses*
2 cups all-purpose flour
3 cups old fashioned oatmeal*
2 teaspoons ground cinnamon
1 teaspoon ground nutmeg, fresh grated is best
⅛ teaspoon ground cloves
1 teaspoon baking soda
1 teaspoon salt
1½ cups raisins**
2 cups boiling water

Optional:  1 cup walnuts or pecans.  Don't be stingy with the nuts, I always think nuts take cookies to a whole new level of deliciousness.

Steps

Preheat oven to 350* and line cookie sheets with a silicon mat or parchment paper, set aside

It's really important to plump the raisins by placing them in a small bowl and pour boiling water on top. Immediately cover with plastic wrap to keep in the heat and set aside while you assemble the cookie dough.  

In a mediums size bowl, mix together flour, oats, spices, baking soda, and salt, set aside

In the bowl of an electric mixer, cream together the butter and sugars until light and fluffy

Add in the vanilla extract and 1 egg at a time until fully combined with the mixer on medium-low

With the mixer on medium-low, slowly pour in the molasses until fully combined.

Scrape down the sides and prepare to add the dry ingredients

Add in the dry ingredients (the oat-flour mixture) in three separate additions, ensuring each is fully combined before adding the next

**Strain the raisins to remove the water and using the back of a wooden spoon, lightly press down on the raisins to squeeze out as much of the water as you can*** - I squeeze between paper towels to get every bit of moisture out.

Add the raisins and nuts to the cookie dough and gently combine with the mixer on low or by hand using a wooden spoon.

Using the big 2-ounce cookie/ice cream scoop, place mounds of cookie dough onto the prepared baking sheets, allowing about 2 inches between each dough placement

Pat each cookie lightly with your hands until it is flattened to a uniform thickness.  Don't smash these until they're thin, you want them fat and plump.

Bake the cookies in the preheated oven for 15-17 minutes until golden brown.  The thickness of the cookies determine how long to ake them, it may take more time than 17 minutes, just watch them and pull when you smell them and they are golden.  

Once baked, let the cookies cool for an additional 1-2 minutes on the tray before transferring to a wire rack to cool completely

Cookies will keep in an airtight container at room temperature for 1 week or frozen for up to 3 months

Notes

Be sure to use dark molasses but not blackstrap molasses. I prefer Grandma's molasses to cook with. 

*Always use Old Fashioned Quaker Oats, the kind that take five minutes to cook. Old Fashioned Quaker Oats are not the same as Quick Oats and they are not Steel Cut Oats. 
🍪
🍪
🍪
#oatmealraisincookie #cookies #oatmealcookies #oatmealraisin #cookieoftheday #quakeroats #sweetraes #sweetraesbakery #cookierecipe #oatmealcookie #bakedwithlove #sweetraesnj #baking #njcookies #njbaking #njbakery #familybakery #oatmealraisincookies #cookiemaking #bakedcookies #sugarfix #bakedgoods #funtimes #funfoods #yummy #sweettooth #bakery #bakerycookies #gourmetcookies


Angel Food Cake with a little sumpin-sumpin...

by 👩‍🍳 Cooking With a Southern Vibe in Music City USA 👩‍🍳, February 14, 2022


I have a love affair with angel food cake, it's light, airy and low in calories, well until you add the glaze, it is.  And I especially like it with pink frosting, the old recipe on the Domino Powdered Sugar Box, but that's not what I'm sharing today.  I'm sharing a lemon or lime glaze with all of you because spring is coming and this girl is a lemon/lime lover, so you will see a lot of citrus recipes showing up in the near future.

The original recipe called for actually making the cake from scratch.  Yikes, I'm not going to do that, it's time consuming, whipping all those egg whites, all that folding, and fingers crossed that it will actually rise to the top of the pan when you bake it.  Instead I buy  a Duncan Hines or Betty Crocker mix. Both of the mixes make an excellent cake, and they never deflate.

What I don't do is buy a bakery angel food cake, they're just not that good, and whipping up one at home from a mix makes me feel like I'm really "baking."   Just follow package directions and let cool completely upside down.

But back to the recipe for the sumpin-sumpin with this cake.  It's a lemon glaze, or if you prefer, a lime glaze.  Here's how you do it, simple, simple and oh so good...

Lemon or Lime Syrup and Lemon or Lime Glaze:

1/2 cup sugar
4 tablespoons fresh lemon or lime juice, reserving 1 tablespoon of juice
1/2 cup powdered sugar

Combine sugar and 3 tablespoons lemon or lime juice in small saucepan; stir over medium heat until sugar dissolves. Brush syrup all over top and sides of cake.

Then stir the 1/2 cup powdered sugar with remaining 1 tablespoon lemon or lime juice in small bowl until smooth. Drizzle glaze over top of cake. Let stand until glaze sets, about 10 minutes. DO AHEAD: Cake can be made up to 1 day ahead. Cover with cake dome and store at room temperature.

Transfer cake to platter; cut into wedges, and if you're into presentation, garnish with strawberries or raspberries and add a dollop of whipped cream.

🍋
🍋
🍋

#angelfoodcake #cake #angelfood #dessert #strawberry #food #baking #strawberries #glutenfree #bakery #instafood #sweet #cakesofinstagram #angelcake #delicious #fluffy #foodphotography #baker #feedfeed #chiffoncake #bakersofinstagram #foodporn #yummy #foodie #chiffon #lemon #lime

Lazy Lasagna, where have you been all my life...

by 👩‍🍳 Cooking With a Southern Vibe in Music City USA 👩‍🍳, February 13, 2022


Love lasagna but hate the process because it's so time consuming.  Lasagna can be really intense to make.

Oh, do I have a great workaround for you, the answer is ravioli, yes, ravioli.  This is so yummy, and so easy to make.  It only takes only a few minutes of prep and its ready for the oven.  And it's just delicious....

2-24 ounce jars of pasta sauce (two jars gives you a generous amount of sauce, you can reduce this to 1.5 jars if you think two jars is too much.  I made it the first time using one jar, and it wasn't enough.
1 25 ounce bag of frozen cheese ravioli

1 lb of ground beef
2 cups of shredded Italian style cheese
1 teaspoon of basil
1 teaspoon of oregano

Steps

Preheat oven to 400 degrees. Spray 9x13 pan. Brown ground beef in skillet and add 3/4th of the sauce to meat and let simmer for about 10 minutes.

Pour remaining sauce in the bottom of casserole dish. Next layer frozen ravioli, then a layer of meat sauce and top with 1/2 the cheese. Layer ravioli again, meat sauce and cheese. Sprinkle basil and oregano on top layer of cheese.

Cover with foil and bake for 30 minutes. Remove foil and bake for 15 more minutes. Let sit 5 minutes before serving

Options

You can make a white lasagna using two jars of Alfredo Sauce and a bag of wilted spinach
Saute onions, garlic and mushrooms with the ground beef for even more flavor
Substitute Italian sausage for ground beef, or mix half and half

Notes

The Italian style shredded cheese contains Mozzarella, Provolone, Parmesan, Romano, Fontina, and Asiago cheese. You can use whatever cheese you like. I also used the Classico tomato and basil pasta sauce 

I bought these lasagna pans as gifts for Christmas last year.  It's really versatile, maybe your kids only eat classic lasagna, you prefer a veggie version, hubby wants his with more meat, this is the answer...

I bought mine here


#pasta #food #ravioli #italian  #italianfood #foodie #pizza #instafood #homemade #beeflasagna #lasagne #foodphotography #foodstagram #cheese #foodlover #yummy #spaghetti #foodblogger #delicious #a #dinner #pastalover #lasagnalover


Let me convince you why you need a bread machine...

by 👩‍🍳 Cooking With a Southern Vibe in Music City USA 👩‍🍳, February 12, 2022


Hello, my name is Jan and I'm a breadaholic, so of course I think everybody should be able to make a perfect loaf of bread with a minimal amount of effort.  My dream job is to work in a bread factory, and no, I'm not kidding, I would work there for free, okay, maybe not for free, but maybe minimum wage with benefits and with access to all the warm bread I want to eat  I would even bring my own butter, just to be in that environment and smell that bubbling, breathing yeast.  I know, I know, it's a dream, but I have many times driven by Lewis Bread Company when they were baking bread in the factory and pulled over just to sit there with my windows rolled down, looking like a complete dork, inhaling that wonderful smell. See what I mean, I really am a breadaholic.

 And while there is nothing better than the smell of homemade bread, there is nothing more time consuming than making a loaf from scratch, and then there is always the possibility that it may not rise.  Been there, done that, so many times.  It's so beyond frustrating when bread doesn't rise or when it overcooks and burns.  I remember back, way, way back, to when hubby and I were first married. I wanted to make homemade bread so badly, I would painstakingly knead that dough for exactly eight minutes, cover it, sit in on the counter and it wouldn't rise.  I would just sit and cry, I really would, which of course did no good, but then I would dry my eyes and try again another day.  These were the days before the Internet, there was nobody to ask questions, but finally I did figure out, somehow, to put the bread in a warm oven and it would help the rise.  But being the ditz that I've always been, more times than I care to remember, I would forget to turn the oven off and then the bread would start cooking and it would be ruined.  Oh, so many disasters, oh the stories I could tell.

And then, finally, finally, I bought a bread machine, specifically the Zojirushi Bread Machine and it was a total game changer, no more ruined bread, it did the work, kneaded the dough,  baked the bread and it never failed, ever. My first Zo made a 2 lb. loaf and now, since it's just me and hubby, I have the mini Zo, which makes a 1 lb. loaf and it's the one we use all the time, it's perfect for two people.

Bread machines fell out of favor a few years ago, so many of us jumped on the low carb bandwagon and we abandoned bread in all forms.  Then came the Pandemic, people were home, they rediscovered the joys of baking bread, and they also rediscovered how difficult it can be to turn out the perfect loaf.  But not with the Zo, it's just the perfect bread machine.  It's not the cheapest, nor the most expensive, but if you are a regular reader of my blogs, you know my motto is pay good money for quality appliances and they will last you for years.  You put in the ingredients and in three hours, forty minutes you have bread.  You can also program it to delay the start so that if you're away from home you can come back to hot bread at your specified time.

Here' the machine we use now to make a 1 lb. loaf and the finished bread 


It's the Mini Zojirushi, sold here on Amazon

If you want a bigger machine, which is what first purchased and still use when family or friends come to dinner, then this is a great option.


It's the Zojirushi Virtuoso Plus, also sold here on Amazon

Here is the slicer I purchased last fall along with the mini Zo for our son's birthday.  The mini is the perfect size for his family of three and this is a great slicer.


It's made of bamboo, comes with a knife and folds to store.


I have a lot of bread recipes for healthy options, whole wheat, grains, Artisan breads, even some copycat recipes from Great Harvest Bread Company which I will be happy to share, if anyone is interested, just leave a message in the comments.  But sometimes you don't want healthy options or Artisan bread, sometimes you just want old fashioned white bread, reminiscent of what Grandma used to make, and if you do, this recipe is the one you want!

And if you don't have or want a bread machine, even though I can't understand why anybody wouldn't, go for it, make this and knead it by hand, proving to yourself that you are a true bread maker and that you don't need a pricey machine, it's much more rewarding to do it by hand.    

So go ahead,  whip up a loaf, and good luck with that 😉 Okay, so I'm kidding, ignore me, I'm just jealous of the bakers that put forth that much effort.  I'm all about making cooking as easy as possible in my old(er) age.

This is for a two pound loaf, if you have a mini Zo, just halve the recipe, easy peasy...

Hubby's Fave Buttermilk Bread

Ingredients:

1 ½ cups buttermilk, but if you don't have buttermilk, regular milk works fine
4 cups bread flour
1 ¼ teaspoon salt
4 Tablespoons sugar
1 ½ Tablespoons oil optional
1 ¾ teaspoons active dry yeast

Instructions

Use the basic setting with medium crust.

Follow the instructions that came with your bread machine in terms of which ingredients to put in the bread machine first.  

Notes

This is a recipe for a two-pound machine. You’ll be using the basic or white cycle with medium crust.
If time is short, you can make this recipe with the quick cycle of your bread machine substitute the active dry yeast with three teaspoons of fast-rising (rapid rise) yeast.

Don’t have buttermilk, but want that tangy taste? To make sour milk add one tablespoon of vinegar to one cup of room-temperature milk. (Adjust amounts as needed for each recipe.) Stir and wait about 5 minutes.


#zojirushi #minizo #minizojirushi #zojirushivirtuoso #homemadebread #bread #homemade #sourdough #breadmaking #sourdoughbread #baking #artisanbread #food #breadbaking #foodporn #realbread #instafood #foodie #homebaking #homemadefood #breadlover #foodphotography #homebaker #bakery #levain #wildyeast #sourdoughbaking #instabread #yummy #sourdoughstarter #breakfast #bakingbread #foodstagram #


Cook like the pros, Ina, America's Test Kitchen, they all use these...

by 👩‍🍳 Cooking With a Southern Vibe in Music City USA 👩‍🍳, February 11, 2022

Barefoot Contessa, America's Test Kitchen, Cooks Country, Giada, Rachael Ray, Paula Deen,  these are just a few of my favorites who use these stack prep bowls.  And since I'm a devoted follower of cooking shows, the search was on.  I found them on Amazon, I pretty much find everything on Amazon.  That little Prime truck comes wheeling in my drive many times a week and it's just like I'm getting presents, well until the credit card bill comes, anyway. 😳

But why did I need these?  It's because  the one thing that these shows have in common, they use these very same set of ten bowls to measure ingredients ahead of time so when it's time to cook they can just dump, mix and go.  This has been eye opening for me, a total game changer that makes the prep process run so much smoother.  Having everything measured and assembled just works.  Organization is a wonderful thing, it really is.  And besides, at my age, I sometimes forget to add ingredients.  Oh let's face it, it has nothing to do with my age, I've always forgotten to add ingredients, and trust me, it's made for some very interesting dishes over the years.   But when everything is pre-measured and ingredients are checked and rechecked, it's a win-win situation.

But back to my story, after watching these shows and seeing so many people using glass prep bowls, of course I wanted them, too.  I am a pretend chef, after all 😉 Okay, so I'm just a cook, but a girl's gotta dream.  And yes, you can use any bowls out of your cabinet, but these just look so... professional!  So, anyway,  I purchased them last year. I get so excited about anything cooking related and this just makes the process fun. I know, I'm a total geek, but it really does take everything to a new level.  I paid over $40 for this set last year, and the prices have tanked, they're just $23.49 now, Prime, free ship.  It's a good deal...

Here's the link....


#americastestkitchen #foodtv #cooksillustrated #cookscountry #kitchenprep #pioneerwoman #barefootcontessa #bobbyflay #kitchen #cooking cookingclasses #cookinglover #cookinglight #cookinggram  #cookinglesson #cookingforhusband #cookingismypassion

Dolly Parton's Milk Gravy

by 👩‍🍳 Cooking With a Southern Vibe in Music City USA 👩‍🍳, February 11, 2022


Who doesn't love Dolly and when she talked about making her husband, Carl, this milk gravy on The Today Show, I was all over this recipe like, well biscuits and gravy 😏

I make it often, hubby and I love it.  Don't leave out the thyme, it's what makes this really special. 

Ingredients:

1/3 cup all-purpose flour
1/4 teaspoon salt
1/4 teaspoon dried thyme
1/4 to 1/2 teaspoon freshly ground black pepper
2½ cups whole milk
1/2 cup heavy whipping cream

Biscuits and sausage patties or bacon, for serving

Steps:

In a small bowl, combine the flour, salt, thyme and pepper. Gradually whisk in milk and cream until smooth.

Pour the mixture into skillet or saucepan. Bring to a boil over medium heat; cook and stir for 2 minutes, or until thickened.

Serve over biscuits and sausage patties or top with bacon.

And since this an indulgence with whole milk and whipping cream, I do have a healthier version that I fix regularly, sometimes we have it for dinner.  I'm a fan of CarbMaster 60 calorie per cup milk from Kroger, but you can use Fairlite or fat free milk as well.  Then use Fat Free Half and Half and Jimmy Dean Sausage Crumbles and you really reduce the calories to a more manageable level.  I also have a workaround for the biscuits.  I toast Sara Lee 45 calorie Delightful Multi Grain Bread and serve the gravy on toast points.  Not quite the same as the fully leaded, but still an excellent gravy on toast for a lot less calories.

Healthy Recipe with Nutritional Info:

1/3 cup all-purpose flour - 150 calories
2.5 cups CarbMaster Milk @60 calories per cup - 150 calories
1/2 cup fat free half and half - 71 calories
1/4 teaspoon salt
1/4 teaspoon dried thyme
1/4 to 1/2 teaspoon freshly ground black pepper

Total - 371 calories

Half Recipe - 185 calories

Optional: Jimmy Dean Turkey Crumbles - 70 calorie per half cup

#dollyparton #countrymusic #dollywood #dolly #nashville #s #country #to #jolene #tennessee #music #queenofcountry #coatofmanycolors #gravy #biscuitsandgravy #countrygravy #countryfood #soulfood #milkgravy


Jennifer Aniston's Salad, she ate this every day on the set of friends...

by 👩‍🍳 Cooking With a Southern Vibe in Music City USA 👩‍🍳, February 10, 2022


This famous salad is what Jennifer Aniston, Lisa Kudrow and Courtney Cox ate every day on the set of friends.  Every single day for ten years.  And they all still look great, maybe they still eat it. 😁

The problem for me is I'm not a fan of mint, so that's out. 😐  I'm not really crazy about cucumber in salad either, and I would rather have roquefort cheese, feta is too bland.  And I would substitute almonds in this instead of pistachios.  This is probably why I don't lose weight, you have to eat this exact same salad, every day, for TEN years! 😳 Oh get real, Jan, I could eat this salad ever single day for the rest of my life and I still wouldn't look like them 😭

I do however like bulgar, chickpeas and red onion, so maybe I will alter this a bit and make it after I float a loan at Kroger's for pistachios.  But wait, they didn't eat dressing on this.  What?  No dressing? Oh, this is a game changer, I don't think I could eat salad with no dressing. 

Seriously, I do think this would be good with a drizzle of EVOO and a squeeze of lemon juice, made just like the recipe, but omitting the mint.

1 cup of bulgur

2 diced cucumbers

1 (15-oz) can of chickpeas, rinsed and drained

¼ cup finely diced red onion

2 tablespoons chopped fresh parsley

1 tablespoon chopped fresh mint

½ cup crumbled feta cheese

½ cup salted pistachios, chopped

Steps

Cook bulgur according to package instructions, and allow to cool completely.

In a large bowl, stir together all ingredients until well combined.

Serve right away, or move to an airtight container to store in the fridge for up to a week.


#jenniferaniston #friends #rachelgreen #lisakudrow #courtneycox  #friendstvshow #friendstv #centralperk #salad #healthyeating #vegan #chickpeas


Smoky Bacon Corn Chowder, a family favorite...

by 👩‍🍳 Cooking With a Southern Vibe in Music City USA 👩‍🍳, February 09, 2022

I've made this recipe forever, but now I do shortcuts to make it better without sacrificing taste.  I use frozen Ore-Ida Cubed potatoes, so much easier than peeling and cubing all those potatoes, and the flavor is exactly the same. 

This recipe is adapted from an old Betty Crocker Cookbook from the 70’s.  It’s a big recipe, I never cut it down, leftovers are great, and you can give it to family and friends, it reheats beautifully, too.

1 bag of the frozen diced potatoes.


If you prefer to cook potatoes yourself:

5 large potatoes, cubed and cooked in salted water (do not overcook, this will take about 10-15 minutes for them to cook).  

8 cups milk (part half and half is awesome, whole milk is good, 2% milk is acceptable, but skim milk is not rich enough)  
1 large onion,diced  
1 lb. bacon  
3/4 cup flour  
2 cans cream style corn  
1 bag frozen corn  
shredded cheese, chopped scallions and crumbled bacon for garnish

While potatoes are cooking, saute bacon in large skillet.  Remove when crisp, drain on paper towels and crumble.

Put onions in bacon drippings and cook until tender.  Remove onions with slotted spoon and put 3/4 cup flour into drippings, stirring constantly.  I usually take this off the burner, as it thickens really quickly.  Then I stir in 2-3 cups of the milk, and put it back on the burner for a minute or so, whisking constantly. 

Meanwhile put the remaining milk in the microwave and nuke it until it’s warm.  If you put cold milk into warm drippings, it can curdle, so always warm everything.  I warm the bag of frozen corn as well.

Put the 2 cans of cream style corn, the bag of warmed frozen corn in a large stockpot, add the onions, drain the cooked potatoes, add them, and I use a strainer to add the flour mixture to the ingredients in the crockpot, as you don’t want any lumps from the flour.  Add salt and pepper to taste, I usually add 1-2 teaspoons of salt and a teaspoon of pepper.  Heat until thick, but not boiling.

Link here to my great cornbread recipe that I always serve it with  this soup.  It's quick, easy and delicious.

Note:  The drippings from a pound of bacon is not too much, don’t decrease the amount of bacon grease, this is a really big recipe, and you need that much to flavor it.  I sometimes add 2-3 tablespoons of butter as well, if I’m making it with 2% milk to give it a richer flavor.


#chowder #soup #chowder #corn #soupseason #foodie#foodphotography #homemade #foodporn #food #foodstagram #foodblogger #dinner #comfortfood #foodiesofinstagram #bacon #delicious #yum #cornsoup #cornchowdersoup #lunch #instafood #souprecipe #foodies  #fallfood #soups 


The Best, Easiest Homemade Cinnamon Roll Pull Apart Ever!

by 👩‍🍳 Cooking With a Southern Vibe in Music City USA 👩‍🍳, February 09, 2022


There is nothing better than a pan of cinnamon rolls hot from the oven.  There is also nothing that is more of a pain in the patootie to make from scratch than a pan of cinnamon rolls.

These yummy pull aparts are a variation of the famous monkey bread that has been around for years.  It was always baked in a bundt or angel food pan and it was really difficult to get cooked in the center without having the edges burn.  I had many doughy centers in the past with those cinnamon pull aparts and knew there had to be a better way.

Well there is!  Forget the bundt pan forget the angel food pan and bake them in a 9x13 pan.  Pure genius. These are so easy, so gooey, so good, grab the kids, have them help and you will have a pan of rolls to put in the fridge overnight to bake in the morning.

Ingredients:

24 Rhodes White Dinner Rolls, dough thawed to room temperature
1-1/4 cups brown sugar
1.5 sticks butter, melted
1.5 Tbsp cinnamon

 Icing:

Sift powdered sugar, stir in cream, and vanilla, then drizzle over pan of inverted hot rolls.

 1 cup powdered sugar
2 Tbsp heavy cream
1 tsp vanilla

Steps:

Cut each roll in half with a pair of kitchen shears. Combine brown sugar and cinnamon in a bowl. If the rolls are still partially frozen I've found they're easier to cut.

Roll each roll piece first in butter and then in cinnamon sugar. Place pieces, touching,  in a 9x 13 pan sprayed with nonstick spray. Just put remainder of the pieces on top to form an additional layer.  Pour remaining butter and sugar over the top of the rolls. Cover with sprayed plastic wrap.

Let rise for 30 minutes.  I don't do this, I put in the oven overnight to bake the next morning.


© Jan CAN Cook · THEME BY WATDESIGNEXPRESS