Happy Birthday sweet daughter-in-law…

by 👩‍🍳 Cooking With a Southern Vibe in Music City USA 👩‍🍳, February 21, 2012

d_edited

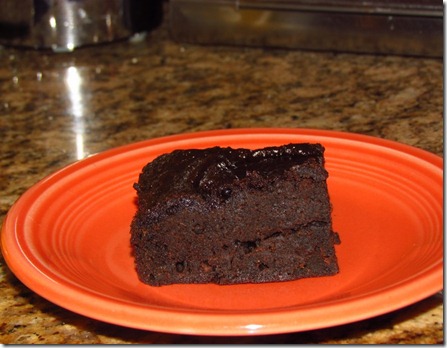
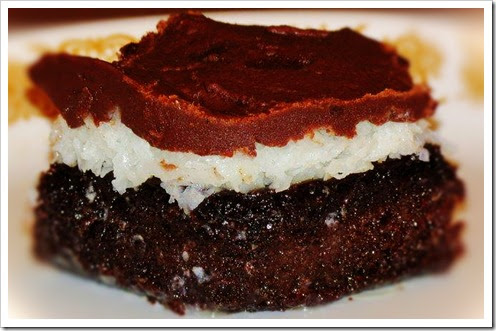
John baked Deanna her Hershey’s Perfectly Perfect Chocolate Cake last night for her birthday today.  This is the ultimate chocolate cake, fudgy, moist, it’s the wonderful chocolate cake we all remember from our childhoods, and it is perfect!  My buddy V told me  about it a few years ago, I made it for the family, we we all adored it, and it’s now one of our favorites.

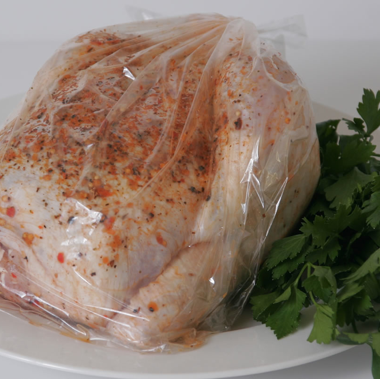
And tonight she requested Pioneer Woman’s Chicken Fried Steak with mashed potatoes, gravy and biscuits.  Oh, be still  my heartRed heart

Happy Birthday Deanna, I wish we were with you to celebrate wth you.  Your father-in-law is absolutely salivating at the thought of that chicken fried steak! 

The absolute WORLD’S BEST Poppyseed Dressing

by 👩‍🍳 Cooking With a Southern Vibe in Music City USA 👩‍🍳, February 10, 2012

strawberry-salad-l_edited_2

This recipe is serious stuff, the thickest, yummiest, best salad dressing you will ever eat.  My friend Ramona gave the recipe to me years ago, and it’s delightful.  This dressing is nectar of the gods, pinkie swear it is.  You will love this!

bon-appetit-leaf

I have modified this by using Splenda instead of sugar.   You can add nuts and fruit to your greens, strawberries, grapes, mandarin oranges, feta cheese, slices of grilled chicken breast is good, too, and it’s wonderful with just onion and mushrooms.  It’s the best salad dressing I’ve ever tasted.  Enjoy  ~ jan

Poppy seed dressing:
3/4 C. (sugar) Splenda -I cut this back a bit, i think 3/4 cup of Splenda is too sweet, so I use a heaping half cup of Splenda
1 t. dry mustard
1/2 C. chopped onion
1 t. salt
1/3 C. balsamic vinegar
1 C. mazola oil
1 1/2 T. poppy seeds - always store poppy seeds in fridge, they get rancid easily, if you have them open in your pantry they are probably rancid, throw them out and buy fresh.

To make dressing:


Whisk together all ingredients until you can no longer feel the sugar grains (because they have dissolved in the liquid) and the whisk leaves a trail in the thickened mixture.

Makes about 3 cups, so you will have leftover dressing.

1_edited

It is the color of molasses, and after it’s refrigerated it’s as thick as molasses, it’s just incredible.

NOTE: When I make this, I find it necessary to blend dressing ingredients in my food processor to get the silky smooth, honey like consistency.  If you just whisk it, sometimes it’s a bit gritty.  I add my ingredients and just pour the oil thru the tube until it is incorporated, don’t overmix it or it will be foamy.  You can also do this in the blender, just don’t overblend it.  It should look like the above picture when it’s finished.

2_edited

It fits perfectly in a pint jar.  I like to use jars because you can spoon out the amount you want, and since I’m a FoodSaver Fruit Jar Sealing Fanatic, I always seal mine in the fridge to keep it fresh.

Growing onions on your windowsill

by 👩‍🍳 Cooking With a Southern Vibe in Music City USA 👩‍🍳, February 09, 2012

newon

I’m fascinated by this concept from DIY.  I found it here and decided to try it.  What you are looking at are three scrawny green onion roots.  You just put them in water in a sunny place, change the water every few days and watch them grow.  I have mine on my computer desk in the sunroom with a western exposure.  Here’s more pictures from another blogger who was successful with it. 

I’m pretty skeptical but I will be fun to see if it actually works. 

Egg in a pepper ring

by 👩‍🍳 Cooking With a Southern Vibe in Music City USA 👩‍🍳, February 07, 2012

EGG

Isn’t this a great idea, kind of like “toad in a hole” but with a yellow pepper ring instead of toast.  I saw this idea a couple of weeks ago, but I can’t remember where so I can’t give credit to the original poster, but it worked great and was really yummy.  I microwaved my pepper slice for a minute to soften it, then broke the egg in it to cook.  I flipped mine, but next time I’m going to cover it with a lid so the top cooks without flipping. 

Slow Cooker Refried Bean Chili

by 👩‍🍳 Cooking With a Southern Vibe in Music City USA 👩‍🍳, February 06, 2012

chili

If you’ve never been to Kalyn’s Kitchen website, you’ve missed out on some really great South Beach recipes.  I’ve been a fan for years, and last week when I saw her recipe for Slow Cooker Beef & Refried Bean Chili, I knew I had to try it.  The problem was I didn’t have all the ingredients, and I’m not a fan of cumin or mexican oregano, so I adapted hers, and it came out amazingly well.  A different take on tomato based chili, this one is a keeper.  So thanks for the idea Kalyn.  I’ll link to your original version at the end of the post.

I only used 1/3 pound of ground sirloin, yes that’s right, just 1/3 pound, and it was enough, but of course you can add more meat if you want.  I also didn’t add the lime juice, but I did squeeze a fresh lime on my portion, I actually prefer it without the lime.

And yes, those are pickles, I’ve eaten pickles with chili since childhood, no peanut butter sandwich for this old girl, just give me some pickles. ;o)

Ingredients:

1/3 lb. ground sirloin
1 large onion, diced
3-4 large cloves of crushed garlic
1 teaspoon salt
1 teaspoon pepper
1/2 teaspoon red pepper flakes
1-2 Tablespoons of chili powder
1 can of Trader Joe’s refried black beans with jalapenos
1 can of light red kidney beans, drained
1 can of dark red kidney beans, drained
1/2 box (2 cups) beef broth
1/2 jar (1.5 cups) salsa
1 can diced tomatoes (I think next time I’ll use Rotel and kick it up another notch)

Brown ground sirloin and onions, stirring in garlic at last minute.  Drain and add to rest of ingredients, simmer in covered pot for 30-45 minutes, or you could put this in a slow cooker on low for 3-4 hours.

It was thick, spicy and delicious.  I always make tomato based chili, so this beef broth based one was really different.  I loved the refried beans to thicken it, it was just a super recipe.  Be sure and compare mine to Kalyn’s, hers looks wonderful.   Oh, so GOOD!  I’ll be making this healthy chili again and again…

~ jan

Adapted from a recipe from Kalyn’s Kitchen

Barefoot Contessa, Ina Garten's Wonderful Lemon Bars

by 👩‍🍳 Cooking With a Southern Vibe in Music City USA 👩‍🍳, February 04, 2012

Insanely good, decadently delicious, these are seriously the best lemon bars I’ve ever eaten. If I could give these bars twenty stars, I would! I made these last week for my daughter-in-law, who loves anything lemon. She adored them, my girlfriends visited, they adored them, we were all moaning with every bite. Not for the faint of heart, these lemon bars are intensey lemon flavored. They actually tasted like a lemon meringue pie without the meringue, they were so custardy inside.  Easy to make, too, my personal tweaks at the end of the recipe.  I will never look further than this for a lemon bar recipe, these are perfection. Thank you Ina Garten, what a National Treasure you are.


Ingredients


For the crust:
  • 1/2 pound unsalted butter, at room temperature
  • 1/2 cup granulated sugar
  • 2 cups flour
  • 1/8 teaspoon kosher salt
For the filling:
Directions

Preheat the oven to 350 degrees F.

For the crust, cream the butter and sugar until light in the bowl of an electric mixer fitted with the paddle attachment. Combine the flour and salt and, with the mixer on low, add to the butter until just mixed. Dump the dough onto a well-floured board and gather into a ball. Flatten the dough with floured hands and press it into a 9 by 13 by 2-inch baking sheet, building up a 1/2-inch edge on all sides. Chill.

Bake the crust for 15 to 20 minutes, until very lightly browned. Let cool on a wire rack. Leave the oven on.

For the filling, whisk together the eggs, sugar, lemon zest, lemon juice, and flour. Pour over the crustand bake for 30 to 35 minutes, until the filling is set. Let cool to room temperature.

Cut into triangles and dust with confectioners' sugar.

Source: FoodNetwork

And now for my tweaks -

iSight-2012-02-4-13-58.png

I made a saddle of parchment paper (I sprayed the parchment with Pam just to be on the safe side) and put it in my 9x13 pan before patting in the crust. Putting a bit of additional flour on your hands really helps press them into the pan easily.

After I baked the lemon bars for the minimum time (just until they slightly jiggled but not brown, the tops were pale, with just a bit of browning around the edges) I put them in the refrigerator overnight. I didn’t cut them, I didn’t dust them with confectioner’s sugar, I just cooled them and put them in the fridge.

The next morning I lifted the edges of the parchment paper, they came out with just a little bit of a tug, I put them on a cutting board, and I put another cutting board on top and flipped them, then it was simple to peel off the parchment paper. It didn’t stick at all, thanks to the Pam. I then flipped them again so they were upright, cut them into large squares, took the cutting board, put it over the sink, used a strainer and dusted the squares heavily with confectioner’s sugar. I used a lot of powdered sugar.

I read all of Ina’s reviews before I made these, and decided to make her original recipe. There was a bit of confusion about the size of the pan, in the following video she says 9x12, but the website says 9x13, I used 9x13 and they were fine. But since I like all things thick, I might consider just the next size smaller pan the next time I make these.  But then again, these were pretty darned perfect...

A few of the reviewers complained that the filling tasted floury. I tasted one corner when they were warm, and I could detect a faint flour taste, but the secret lies with overnight chilling. This allows the flavors to marry, and trust me, you don’t taste flour, you taste lemon! Utterly delightful, yummy, fresh lemon. I think they are best cold, too. I learned from my elderly neighbor, who loves cold cake and bars, that things straight from the fridge do have a delightfully fresh, cool taste.

The bar in this picture was the last one, and it was a couple of days old by the time I photographed it, so I just gave it a fresh dusting of confectioner’s sugar.

I’ve made lemon bars many times, but never with results like this. I think in the past I always dusted with the sugar too soon and it soaked into the bars, and I never refrigerated them. But, oh what a difference a day in the refrigerator makes...

Give these bars a try the next time you want a WOW Dessert! OH WOW, OH WOW, OH WOW!!!!!!!!!


Here’s Ina’s original video, watch this and it will make everything oh so simple.

bonappetit-2012-02-4-13-58.png


Bakery Style Brownies

by 👩‍🍳 Cooking With a Southern Vibe in Music City USA 👩‍🍳, February 04, 2012

2

I have a technique for you this morning.  I’m a fan of thick brownies, really thick ones like you get at the specialty bakery shoppes.  I don’t like thin brownies spread out in a 9x13 pan, I want them fat.  I used to bake in a 9x9 pan, sometimes in an 8x8 pan, and I got pretty good results, but I found the best way to bake them is in a 9x5 loaf pan.  They take longer to cook, but the results are worth it, thick, dense brownies.  I do the same thing with our old family favorite, Rice Krispie Treats.  I’ve bought them at Starbucks, they taste pretty much like the ones I make, but theirs are very thick.  So I made a batch in a loaf pan, then I turn them on a cutting board and slice them.  Voila, thick Rice Krispie Treats, and a lot less expensive than the ones at the Bucks.

Give this technique a try, I think you will be impressed with the results.

~ jan

BTW, the brownie you are looking at is a low fat, lower calorie version.  Just take a brownie mix, stir a can of pumpkin into it, and an egg.  No water, no oil, just those three ingredients.  The result is rich, ooey gooey low-cal brownies without the fat.  Yes, you can see the specks of pumpkin in my picture, but you don’t taste it, pinky swear you don’t, it just tastes like chocolate.  They aren’t iced either, the tops get gooey if you cover them and let them set overnite.

You can make the same recipe using a cake mix, just use pumpkin and any flavor of cake mix, I like spice a lot, I don’t even use an egg, some people do,  I just mix the pumpkin with the cake mix.  You may think it’s too dry, just keep mixing, it will turn to batter. Here’s a link to how it’s made with lots of reviews.  It’s a good thing ;o)

And back to those Rice Krispie Treats, I was on another blogger’s site today, Krissy’s Creations and she made Brown Butter Vanilla Rice Krispie treats.  I think my family would love them, here’s her link if they sound as good to you as they do to me…

© Jan CAN Cook · THEME BY WATDESIGNEXPRESS