Showing posts with label Tried 'N True Hall of Fame

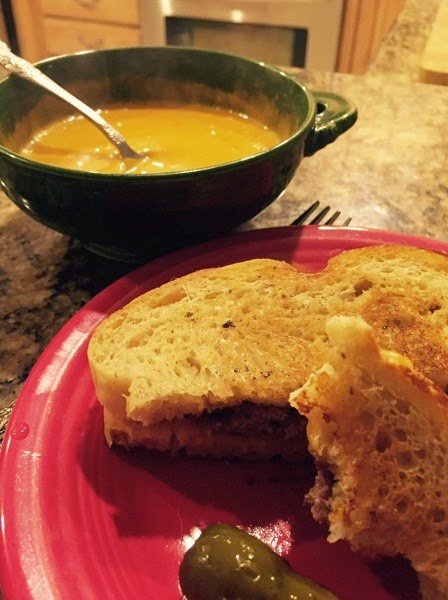
Vitamix Tomato Basil Soup

by 👩‍🍳 Cooking With a Southern Vibe in Music City USA 👩‍🍳, February 25, 2015

Soup

This was absolutely delicious.  Okay, so my picture isn’t perfect, the patty-melt is in the front, the soup has been slurped up a bit.  But this is real life, not a photo shoot. :)

This was so simple, and it turned out perfect.  If you don’t have a Vitamix, I’m sure you could achieve same results in a regular blender and then heat on the stove.

2 cans of diced tomatoes (original recipe called for italian style with oregano, basil and garlic)  I didn’t have those, all I had was a can of stewed tomatoes and a can of diced tomatoes, so that’s what I used, and added a bit of basil leaves and garlic powder.

1 8 oz. block of cream cheese 

A dash of sweetener (I used 3 drops of EZ-Sweetz) or sugar, about 1-2 teaspoons to cut the acidity.

I put all of this in the Vitamix and set it to soup, in 6 minutes, I had hot wonderful tomato soup.  It keeps well, leftovers are great!

Since I used the Vitamix I didn’t soften the cream cheese to room temp, I just put it in cold, but if you’re blending in a regular blender I would soften cream cheese first...

I think I’ll try this same recipe with broccoli or cauliflower and add some cheddar cheese along with the cream cheese.  Who would have thought soup could be so easy...


Hammie Sammies

by 👩‍🍳 Cooking With a Southern Vibe in Music City USA 👩‍🍳, November 14, 2014


Mini Baked Ham Sandwiches | Lunch | King s Hawaiian Recipes


Hammie Sammies are a huge hit, my friend Nisha made them for a tailgating party and declared them a “must try.”  My neighbor, Julie had them at a shower and said they were fantastic.  This is on our family’s list to make this holiday season, since you make them the night before, it’s an easy fix ahead meal to pop into the oven during this busy time.

Here’s a variation of the original recipe from King’s Hawaiian Rolls

Mini Baked Ham Sandwiches

Prep time: 10 min

Cook time: 20 min

Serving Info: 12 people

Ingredients

1 pound deli ham shaved

1 pound swiss cheese thinly sliced

1 1/2 sticks butter

1 1/2 tablespoons Grey Poupon Dijon Mustard

1 1/2 teaspoons Worcestershire Sauce

1 small onion, diced

2 12-pack  KING’S HAWAIIAN Savory Butter Dinner Rolls (you won’t need all of these, but you do need two packages to fill a 9x13 pan

Optional:  1 Tablespoon of poppy seeds

Preparation

1. Melt butter, saute onions until soft and whisk in dijon mustard, worcestershire sauce and poppy seeds if desired

2. Cut the entire pack of rolls in half, horizontally (keeping all top and bottom halves separately intact).

3. In a 9x13 inch pan sprayed with Pam, place bottom half of rolls and cover with ham and cheese.  You will need to use a few rolls from the 2nd pack to fill the pan.

4. Cover ham and cheese stacks with top half of rolls.

5. Drizzle butter mixture over top of rolls, making sure onion is evenly distributed.

6. Refrigerate over night.

7. Bake covered at 350 degrees for 10 minutes, uncover and bake an additional 5-10 minutes and, once finished, separate for serving.

Some recipes call for part of the sauce to be drizzled over the ham and cheese, then put on the top roll and drizzle on the rest.  Nisha just drizzled hers over the top and it worked great.

Taste this before drizzling to see if you want additional mustard or Worcestershire Sauce, some people prefer it a bit more tangy...

IMG 0360


Perfect Chicken and Dumplings

by 👩‍🍳 Cooking With a Southern Vibe in Music City USA 👩‍🍳, November 10, 2014

NewImage


Yes, these are wonderful.  Stephanie, from So Simply Stephanie,  has a post about how to make them, the lady knows her stuff.

Check out the how to’s here...

Tupelo Honey Buttermilk Biscuits

by 👩‍🍳 Cooking With a Southern Vibe in Music City USA 👩‍🍳, September 08, 2014

NewImage

"A good biscuit starts with good flour," says Jason Roy, owner of Biscuit Head who serves the famous Tupelo Honey Cathead Biscuits. Like many Southern cooks, he uses self-rising flour because it's pre-mixed to include a blend of hard and soft wheat as well as a leavening ingredient for the perfect rise—something you can't get in plain all-purpose, cake, or pastry flour. (Want to reallydo as the Southerners do? Try White Lily self-rising flour, available nationwide at specialty supermarkets and online.)

Whether you use shortening, lard or butter as your fat of choice, "snap it in" like Brian Sonoskus, chef of Tupelo Honey Café, does. "Pinch the flour and fat together like you're snapping your fingers," he explains. This creates thin sheets of butter that create puff pastry-like layers in your biscuits.

For soft and fluffy biscuits, blend the liquid and dry ingredients just until the dough "resembles cottage cheese," Sonoskus says. This stops you from activating too much gluten in the flour and ending up with a tougher biscuit that doesn't rise as high. But even if you mix too much, don't worry. "Denser biscuits have their place—they're better for making sandwiches," he rationalizes.

Gently shape biscuits with an ice cream scoop instead of a biscuit cutter. That's what Roy does to make Biscuit Head's oversized cathead biscuits, so-called because they're as big as a cat's noggin. Whether you make them big or small, it's an incredibly easy and foolproof technique. Don't have a spring-loaded scoop? Use a measuring cup and a silicone spatula.

Use real buttermilk if you can get it. Both chefs pledge allegiance to Asheville-based Cruze Dairy's whole-milk buttermilk for its unsurpassed creaminess and acidity. Look for local farms in your area to get the good stuff, not the watery low-fat substitutions found at the supermarket.

Ready to try it yourself? Here's Tupelo Honey's much-sought-after recipe:

Tupelo Honey Buttermilk Biscuits

Makes 10 biscuits

  • 2 cups White Lily self-rising flour
  • 1 tablespoon sugar
  • ½ teaspoon salt
  • ⅓ cup chilled shortening, cut into pieces
  • ½ cup heavy cream
  • 1 cup buttermilk
  • Melted butter

Preheat the oven to 425°F and position the oven rack slightly below the center of the oven. Lightly butter a round cake pan or cast-iron skillet.

In a large mixing bowl, whisk the flour, sugar and salt. Snap the pieces of shortening with your fingers until the shortening pieces are no larger than peas. Make a well in the mixture and pour in the cream and ⅔ cup of the buttermilk. Using your hands or a rubber spatula, sweep in the flour and turn the dough until the dry ingredients are moistened and the dough resembles cottage cheese, adding enough of the remaining ⅓ cup buttermilk to reach this consistency.

Sprinkle the rolling surface with flour. Turn the dough out onto the surface and sprinkle the top with flour. With floured hands, fold the dough in half and pat the dough into a ⅓- to ½-inch-thick round, using additional flour as needed. Flour again if necessary and fold the dough in half a second time. If the dough is still clumpy, repeat the folding process for a third time. Pat the dough into a 1-inch-thick round. Dip a 2-inch biscuit cutter into the flour and cut out biscuits, ensuring you do not twist the cutter.

Place the biscuits in the pan, sides slightly touching. Brush the tops of the biscuits with melted butter and bake for 15 to 20 minutes, until light golden brown, rotating the pan 180°F after 6 minutes. Remove from the oven and brush the biscuits again with melted butter.

Reprinted with permission from Tupelo Honey Cafe: New Southern Flavors from the Blue Ridge Mountains by Elizabeth Sims with Chef Brian Sonoskus, Andrews McMeel Publishing, 2014.

LEMONADE PIE, NOT THE ONE YOU'RE USED TO...

by 👩‍🍳 Cooking With a Southern Vibe in Music City USA 👩‍🍳, July 02, 2014

NewImage


I first posted this recipe back in 2009, it’s a family favorite and worth repeating.  Perfect for the 4th of July weekend, with fresh blueberries and strawberries for garnish… ~ Jan

Prep: 10 min., Freeze: 4 hrs.

Yield

Makes 8 servings

Ingredients

  • 2  (5-oz.) cans evaporated milk
  • 2  (3.4-oz.) packages lemon instant pudding mix
  • 2  (8-oz.) packages cream cheese, softened
  • 2  (3-oz.) packages cream cheese, softened
  • 1  (12-oz.) can frozen lemonade concentrate, completely  thawed
  • 1  (9-oz.) ready-made prepared graham cracker crust
  • Garnishes: whipped cream, fresh mint sprigs, lemon slices

Preparation

1. Whisk together evaporated milk and pudding mix in a bowl 2 minutes or until thickened.
2. Beat cream cheeses at medium speed with an electric mixer, using whisk attachment, until fluffy. Add lemonade concentrate, beating until blended; add pudding mixture, and beat until blended.
3. Pour into crust; freeze 4 hours or until firm. Garnish, if desired.

Note:  The original recipe called for partially thawed lemonade concentrate – that’s what I did, but when I incorporated it with the softened cream cheese, the cream cheese congealed into small pieces, and it was really difficult to get it smooth again.  This can easily be remedied by using thawed concentrate.  ~ jan

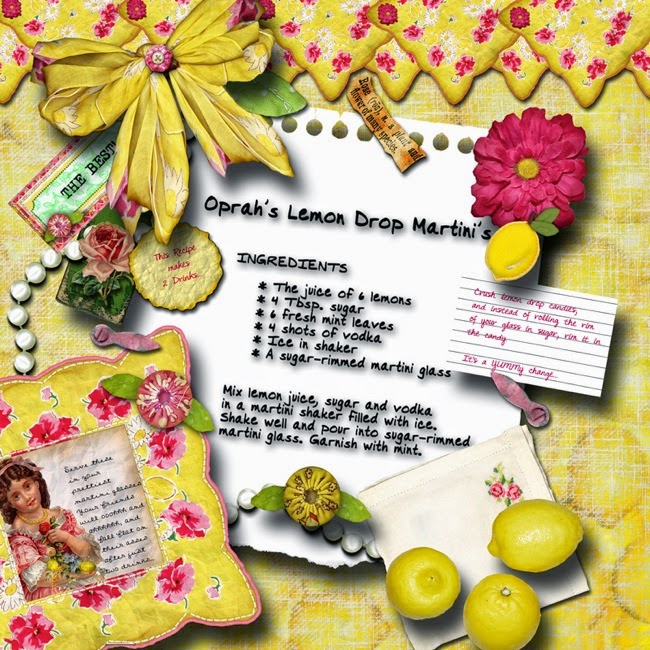
Oprah's Lemon Drop Martini's

by 👩‍🍳 Cooking With a Southern Vibe in Music City USA 👩‍🍳, June 30, 2014

Lemon drop martini

THE BEST GREEK YOGURT YOU WILL EVER EAT...

by 👩‍🍳 Cooking With a Southern Vibe in Music City USA 👩‍🍳, May 25, 2014

Making greek yogurt

This is seriously the best yogurt you will ever put in your mouth!

I’ve been making my own Greek Yogurt for a couple of years now.  I first heard about how to do it from Paula at Salad In a Jar, tried it, and was instantly hooked.  I’ve made it many times now, both with whole milk, 2% and skim, and of course making it with whole milk is by far the best!   It’s high in protein, satisfying, so creamy and smooth, there is no comparison to homemade and the yogurt you buy in the store.  And it’s strawberry season, homemade greek yogurt topped with fresh strawberries and blueberries is completely decadently delicious!

I’ve blogged about it before, and updated it several times after I invested in a Boullion Strainer and a YoGourmet Electric Yogurt Maker.  And somethings are just too good not to share again.

So let’s go back into my archives on this Memorial Day eve, and read again about how to make the most amazing yogurt you will ever put in your mouth.

Try it, you will love it, I pinky swear you will.  ~ Jan

Jan Makes Greek Yogurt


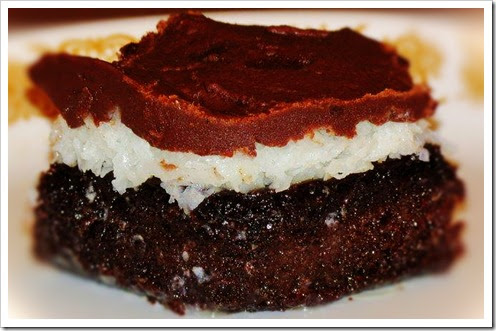
Texas Sheet Cake

by 👩‍🍳 Cooking With a Southern Vibe in Music City USA 👩‍🍳, May 15, 2014

Sheetcake

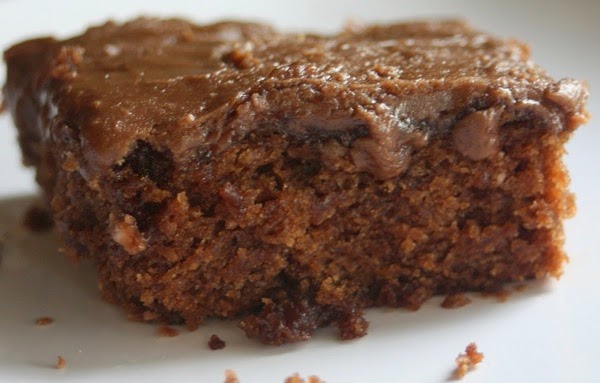
I’ve loved Texas Sheet Cake since my mother introduced it to me in the 70’s.  It’s a family favorite, we’ve tried all kinds of different variations, including peanut butter, and Coca-Cola sheet cake, but we always come back to this recipe.  It’s just the best, moist, gooey, delicious, decadent dessert.  What could be better… ~ Jan

For the Cake:

  • 1/2 cup buttermilk
  • 2 eggs
  • 2 cups granulated sugar
  • 2 cups all purpose flour
  • 1 teaspoon baking soda
  • 1/2 teaspoon kosher salt
  • 2 sticks (1 cup) of unsalted butter
  • 2 tablespoons canola oil
  • 1 cup water
  • 6 tablespoons of unsweetened cocoa
  • 1 teaspoon of pure vanilla extract
  • For the Frosting:

    • 1 stick (1/2 cup) of unsalted butter
    • 6 tablespoons of milk
    • 4 tablespoons of unsweetened cocoa
    • 1 (1 pound) box of powdered sugar
    • 1 teaspoon of pure vanilla extract
    • 1 cup of chopped pecans, toasted,optional
    • 1 cup coconut, optional

    Instructions

    Preheat oven to 350 degrees. Spray a 9 x 13 inch pan with Pam.  Some recipes call for making this in a jelly roll pan, but our family likes thick cake, so I always make it in a 9x13.

    In a measuring cup, measure out 1/2 cup of buttermilk. Add 2 eggs to that and beat until well blended; set aside. Whisk together in a large bowl, 2 cups sugar, 2 cups flour, 1 teaspoon baking soda, and 1/2 teaspoon salt. Make a well in the center and set aside.

    In a medium saucepan, combine the 2 sticks of butter, the 2 tablespoons oil and 1 cup of water and bring to a near boil. Remove pot from the heat and whisk in 6 tablespoons of cocoa, until smooth. Stir in 1 teaspoon of vanilla and add this mixture to the sugar and flour mixture; stir until well blended. Slowly add in the buttermilk and egg mixture and stir well.

    Pour the batter into the prepared pan and bake at 350 degrees until the center is set, about 20 to 25 minutes for a sheet cake, about 35 to 40 minutes for a regular 9 x 13 inch pan. While the cake is cooking, toast the pecans in a dry pan, tossing regularly until fragrant, about 5 minutes, set aside to cool.

    When cake is about 5 minutes from being done, prepare the frosting. Do not do the frosting ahead of time because it will quickly stiffen. Heat the stick of butter and 6 tablespoons of milk in a saucepan just until it comes to a boil. It will need to be very hot. Remove from the heat and whisk in the remaining 4 tablespoons of cocoa. Mixture will thicken. Add in the powdered sugar and vanilla and quickly beat with a wooden spoon until smooth, returning to a low burner if mixture thickens too quickly. Immediately stir in coconut and nuts if desired and pour the frosting all over the cake. Working quickly, use a spatula to gently push the frosting out to the edges and to cover the cake evenly. Sprinkle top evenly with the additional toasted pecans, if desired. Set entire pan aside on a wire rack and allow the cake to cool completely before slicing.

    Cook's Notes: When the cake comes out of the oven, quickly poke holes all over it and then pour the icing on top.

    Tips: This will be a very moist cake, so you aren't looking for a dry surface when it is done. As always, take care to not overcook your cake. If you shake the pan and the cake doesn't jiggle, it's done! Frosting will set fast, so ya gotta move fast! If your frosting stiffens too quickly, you can also thin it with a little additional milk if needed, and return it to a low heat.  This cake is better after it sits overnight, even better after it ages a couple of days, but who can wait that long!


    Food Tv's No. 1 Most Requested Recipe, Alton Brown's Baked Mac and Cheese

    by 👩‍🍳 Cooking With a Southern Vibe in Music City USA 👩‍🍳, December 08, 2013

    NewImage


    NewImage

    INGREDIENTS

    • 1/2 pound elbow macaroni
    • 3 tablespoons butter
    • 3 tablespoons flour
    • 1 tablespoon powdered mustard
    • 3 cups milk
    • 1/2 cup yellow onion, finely diced
    • 1 bay leaf
    • 1/2 teaspoon paprika
    • 1 large egg
    • 12 ounces sharp cheddar, shredded
    • 1 teaspoon kosher salt
    • Fresh black pepper
    • TOPPING:
    • 3 tablespoons butter
    • 1 cup panko bread crumbs
     

    DIRECTIONS

    Preheat oven to 350 degrees F. 
    In a large pot of boiling, salted water cook the pasta to al dente. 
    While the pasta is cooking, in a separate pot, melt the butter. Whisk in the flour and mustard and keep it moving for about five minutes. Make sure it's free of lumps. Stir in the milk, onion, bay leaf, and paprika. Simmer for ten minutes and remove the bay leaf. 
    Temper in the egg. Stir in 3/4 of the cheese. Season with salt and pepper. Fold the macaroni into the mix and pour into a 2-quart casserole dish. Top with remaining cheese.

    Source:  Food Network

    St. Phillips Church Social Coleslaw

    by 👩‍🍳 Cooking With a Southern Vibe in Music City USA 👩‍🍳, September 08, 2013
    Photo  9

    Old fashioned church socials have the best food.  Every summer we go to a local Parish for their wonderful summer social, and this year was no exception.  My son and his wife were visiting, and he just loved the coleslaw.  And because church ladies are so congenial, they shared the recipe with me.  This is a keeper, it's different because it's vinegar and sugar based, but has no oil.  If you use Splenda instead of sugar, you don't lose any of the taste, but it takes away the calories.  It keeps well in the fridge, too, in fact, it's better after it sits for a few hours.  I jar mine up in a Ball wide mouth quart jar, I do love those Ball jars... ~ Jan

    I tweaked the original recipe a bit, I used pre bagged coleslaw mix, so I had to adjust the liquids.

    1 bag coleslaw mix
    1/2 green pepper, chopped (I used food processor)
    2 carrots, chopped (food processor again, let the machine do the work :-)
    4 chopped green onions (food processor)
    1/4 cup chopped celery (food processor)
    -------------------------------------------
    Mix together:
    1/2 cup white vinegar
    1/2 cup sugar or Splenda
    1 teaspoon pepper
    2 teaspoons garlic powder
    1 heaping teaspoon celery seed
    1 teaspoon salt

    Stir all together until sugar or Splenda dissolves and pour over coleslaw mixture.  It wilts down after a few minutes, this is enough dressing for the entire bag of coleslaw mix.

    Crockpot Chicken in a Bag, Moist, Fall Apart Tender, BEST CHICKEN, EVER!!!!

    by 👩‍🍳 Cooking With a Southern Vibe in Music City USA 👩‍🍳, June 29, 2013


    NewImage

    This is so tender it falls off the bone.  I've been making this recipe for years, and all of a sudden it's popping up everywhere online.  It's so simple, and you can season it the way you want to make it your own recipe.  Back in the day we used to call it "sticky chicken" because its so tender.

    You just take a whole chicken, season it, put it in a Reynolds Cooking Bag, (the kind you put a turkey in at thanksgiving, but a smaller size for a chicken, or just use the big turkey bag if you can't find a small one) twist it shut with a twisty and put it in the crockpot, no liquid, nothing, don't worry it won't burn.  Cook it on low for 8-10  hours, or high 6 hours and the chicken literally falls off the bone.

    I lift the bag out of the crock, snip the end and drain the chicken stock to use later.

    This is a win-win recipe, you will love it!  Pinky swear you will.

    Variations:

    Season it with fresh herbs, stuff it with lemons, apple, oranges, any kind of fruit you want.  Sprinkle ranch dressing on it, or taco seasoning, the possibilities are endless.  I like it with just salt and pepper myself.

    You will never make more tender chicken than this.

    Enjoy!!! ~ Jan

    Cracker Barrel Coca Cola Cake

    by 👩‍🍳 Cooking With a Southern Vibe in Music City USA 👩‍🍳, May 04, 2013

    NewImage


    This is an absolutely delicious copycat recipe of Cracker Barrel's Famous Coca Cola Cake.  I like to add coconut and pecans to the frosting, but it's great plain, as well.  

    The recipe is similar to Texas Sheet Cake, a recipe I've made since the 70's.  Texas Sheet Cake uses two sticks of butter, this one uses a stick of butter and a half a cup of oil.  I actually like this better, because oil makes a really moist cake.  The addition of a cup of Coke is the only difference between my original Texas Sheet Cake and the Cracker Barrel clone.  

    People love this cake, make it a day ahead and it's really moist.  A definite 5 Star recipe!  

    Enjoy… ~ Jan

    Ingredients:
    1 cup coca-cola
    1 stick margarine
    1/2 cup oil - I actually use a generous half cup of oil
    3 HEAPING tablespoons cocoa powder
    2 cups sugar
    2 cups all-purpose flour, sifted
    1/2 teaspoon salt
    2 eggs
    1/2 cup buttermilk
    1 teaspoon baking soda
    1 teaspoon vanilla extract

    ***Frosting***
    1 stick margarine
    3 HEAPING tablespoons cocoa powder
    6 tablespoons cream or milk  - I use Fat Free Half and Half, and it works great!
    1 teaspoon vanilla extract
    1 pound confectioners sugar

    Directions:
    In a saucepan, bring coca-cola, margarine, cocoa and oil to a boil. In a separate bowl mix sugar, flour and salt, then pour the boiling mixture over the dry ingredients and whisk until blended. Beat eggs, buttermilk and vanilla together, and add to wet ingredients.  Pour into a  9×13 pan that has been sprayed with PAM and bake at 350 degrees for 25-30 minutes.

    For Frosting: Sift confectioner's sugar - be sure and do this so it doesnt lump.  

    In saucepan combine margarine, cocoa and milk and heat until the butter melts. Beat in the remaining ingredients and spread onto HOT cake. Cool and cut.

    The World's Best Lemon Coconut Cake

    by 👩‍🍳 Cooking With a Southern Vibe in Music City USA 👩‍🍳, April 06, 2013

    Lemon Coconut Cake


    This cake is delicious, I mean seriously, decadently, wonderful, too marvelous for words!  I've baked cakes for years, and this one is in the top five of the best ever.  I adapted it from a recipe from Sugar & Spice by Celeste, it's a "must try" if you are a lemon lover.

    Here is Celeste's recipe, and following it are my adaptions:

    Lemon-Coconut Cake
    Makes one - 9 inch (23 cm) layer cake.
    Source: joyofbaking.com
    Originally Adapted From: Foster, Sara. 'The Foster's Market Cookbook'. Random House. New York: 2002.

    Ingredients:
    Lemon Curd:
    3 large eggs
    1/3 cup (80 ml) fresh lemon juice (2-3 lemons) (do not use the bottled lemon juice)
    1 tablespoon (4 grams) finely shredded lemon zest (outer yellow skin of lemon)
    3/4 cup (150 grams) granulated white sugar
    4 tablespoons (56 grams) unsalted butter, at room temperature and cut into small pieces

    Coconut Cake Recipe:
    6 large eggs
    2 1/2 cups (325 grams) all purpose flour
    2 tsp baking powder
    1/2 tsp baking soda
    1/2 tsp salt
    3/4 cup (170 grams) unsalted butter, room temperature
    1 3/4 cups (350 grams) granulated white sugar, divided
    1 tsp coconut extract
    1 3/4 cups (420 ml) buttermilk
    1/2 tsp cream of tartar

    Frosting:
    2 large (60 grams) egg whites
    1 1/2 cups (300 grams) granulated white sugar
    1/4 cup (60 ml) cold water
    1 tablespoon light corn syrup
    1 teaspoon pure vanilla extract

    Garnish:
    2 cups (150 grams) sweetened shredded or flaked coconut (can use unsweetened dried coconut)

    Directions:
    Lemon Curd:
    In a stainless steel bowl placed over a saucepan of simmering water, whisk together the eggs, sugar, and lemon juice until blended. Cook, stirring constantly (to prevent it from curdling), until the mixture becomes thick (like sour cream or a hollandaise sauce) (160 degrees F or 71 degrees C). This will take approximately 10 minutes. Remove from heat and immediately pour through a fine strainer to remove any lumps.

    Cut the butter into small pieces and whisk into the mixture until the butter has melted. Add the lemon zest and let cool. The lemon curd will continue to thicken as it cools. Cover immediately (so a skin doesn't form) and refrigerate until cold. The lemon curd can be made several days (up to a week) in advance.

    Preheat oven to 350 degrees F (177 degrees C). Butter and flour two - 9 inch x 1 1/2 inch (23 x 3.75 cm) cake pans, and then line the bottoms with parchment paper (or spray with Bakers Joy).

    Coconut Cake:
    While the eggs are still cold separate the eggs, placing the yolks in one bowl and the whites in another bowl. Cover the two bowls with plastic wrap and allow the eggs to come to room temperature before using (about 30 minutes).

    In a mixing bowl sift or whisk together the flour, baking powder, baking soda, and salt.

    In bowl of electric mixer, or with a hand mixer, beat the butter until soft (about 1-2 minutes). Gradually add 1 1/2 cups (300 grams) of the sugar and beat until light and fluffy (about 2-3 minutes). Add the egg yolks, one at a time, beating well after each addition. Scrape down the sides of the bowl. Add the vanilla extract and beat until combined.

    With the mixer on low speed, alternately add the flour mixture and buttermilk, in three additions, beginning and ending with the flour.

    In a clean bowl of your electric mixer, with the whisk attachment, (or with a hand mixer) beat the egg whites until foamy. Add the cream of tartar and continue beating until soft peaks form. Gradually add the remaining 1/4 cup (50 grams) of sugar and continue to beat until stiff peaks form. With a rubber spatula gently fold a little of the whites into the batter to lighten it, and then fold in the remaining whites until combined. Do not over mix the batter or it will deflate.

    Divide the batter and pour into the prepared pans, smoothing the surface with an offset spatula or the back of a spoon. Bake for about 35 to 40 minutes or until a toothpick inserted into the center of the cake comes out clean and the cake springs back when pressed lightly in center.

    Place the cakes on a wire rack to cool, in their pans, for about 10 minutes. Then invert the cakes onto a greased rack. To prevent splitting, reinvert cakes so that tops are right side up. Cool completely before filling and frosting.

    Frosting:
    In a stainless steel bowl over a saucepan of simmering water, place the egg whites, sugar, water, and corn syrup. With a handheld electric mixer beat the mixture for 3 to 4 minutes on low speed. Increase the speed to high and continue to beat for another 3 to 4 minutes or until the icing is shiny and satiny with soft peaks.

    Remove from heat, add the vanilla extract, and continue to beat on high speed for another 1 to 2 minutes or until the frosting is thick. Use immediately.

    To Assemble:
    With a serrated knife, cut each cake layer in half, horizontally. Place one cake layer on your serving plate and spread with about 1/3 of the lemon curd and sprinkle with about 2 tablespoons of coconut. Continue with the next layers, stacking and filling with the lemon curd and coconut. Frost the top and sides of the cake with the 7-Minute Frosting and then sprinkle with about 1 cup of coconut. Cover and refrigerate the cake until serving time.

    ---------------------------------------------------------------------

    My Tweaks:

    Lemon Curd - I made this a couple of days ahead, just like her recipe, except I used 1/2 cup of fresh lemon juice, because we love tart lemon curd, and added extra lemon zest.

    Cake Batter:  I omitted the coconut extract, and added an extra splash of vanilla, because I didn't want the coconut flavor, just the coconut on the top.  

    Frosting:  This was time consuming, but worth it.  I beat the mixture for four minutes on low, then four minutes on high, to get the soft peaks, then additional two minutes.  Very time consuming over a hot pan of water, but totally worth it.  

    Assembly:  I totally dropped the ball on this, instead of splitting the layers and putting lemon curd between each layer, I just put lemon curd on top of the first layer, then icing, then put the other layer on top, and it wanted to slide off the bottom layer.  I then put on more lemon curd and iced it.  Next time I will make it like Celese says, and split the layers, and add the lemon curd.  I still won't put coconut between the layers, just on top, as not everyone in our family is a fan of coconut.

    Photo Courtesy of Sugar & Spice by Celeste

    Click here Celeste's original recipe and instructions

    The absolute BEST Greek Yogurt

    by 👩‍🍳 Cooking With a Southern Vibe in Music City USA 👩‍🍳, February 22, 2013

    NewImage


    It's been a year now since I started making Greek Yogurt.  In the beginning I made it with non-fat milk, several months passed and it wasn't working any longer.  I made it exactly the same way, but always ended up with just sour milk.  So I got discouraged and quit.  Then last fall I read an article about how your digital thermometers have to be recalibrated on a regular basis, and the light dawned.  My temperature was off, that's why it wasn't working!  

    So I pitched the digital thermometer, went back to using a regular meat/utility thermometer and I was back in business.  And then I decided to try eating low-carb for the umpteenth time and read that I could eat whole milk yogurt.  I started making it, and oh my, it's absolutely decadent, wickedly delicious, there is no comparison between non-fat yogurt and whole milk yogurt.  It has 20+ grams of protein per cup and approximately 220 calories, but I never eat a cup, a half of a cup is sufficient.  I eat it with raspberries, blackberries, strawberries.  I mix a tablespoon of peanut butter in it, sometimes I use maple extract, sometimes lemon, but I always use a lot of Splenda.  It isn't that sour to begin with, not like Fage or Chobani Greek Yogurt you buy in the store, but it's so good sweetened, it's almost like ice cream.

    I make it and give it away, and always get great feedback.  I make it every couple of days, a half gallon of milk makes a quart of yogurt.  I bit the bullet and invested in equipment, a YoGourmet Yogurt Incubator and that pricey Mafter Boullion Strainer, and it was worth every penny.  I've already paid back my investment many times over, since I get a gallon of milk for $1.79 at Aldi's, and a gallon makes two quarts of yogurt.  I know I'm repeating some of this information, but I've had so many people ask about this and some things are worth repeating.

    I've read extensively about yogurt making, you don't have to buy any equipment.  Some people incubate theirs on a heating pad, I used to put mine in the oven with the light on, another way of incubating is to wrap it in a towel and put it in an insulated cooler along with a bowl of hot water.  There is a ton of information about yogurt making if you just Google it.  

    When I tell people what I do to make it, the standard response is "that's too much trouble."  But once you do it a few times it's a no brainer and doesn't take that much effort.  I know exactly how long it takes to get to temperature in my microwave, I know that it takes 20-30 minutes for the temperature to fall to 100-110 degrees in an ice water bath, then I just put it in the YoGourmet, and in 6-8 hours I have yogurt.  

    I always refrigerate mine for a few hours or overnight before I strain it, it just works better to refrigerate it first.  Then whisk, jar it and enjoy.

    Okay, that's my last yogurt post for now, but I did want to update you one more time.  I'm going to give you some links to my original entry, but do yourself a favor and watch Paula's video.  I consider myself a serious yogurt maker these days, but Paula is the guru.  And yes, I know I've already put her video on here, but it's worth watching again.

    I've tried several different recipes, including adding dry milk.  Yuck!  Paula's recipe is best by far, trust me on this one.

    Now go buy a gallon of whole milk, and make some yogurt, it's good for your bones and it's good for your gut and it tastes like no yogurt you've ever eaten.  And don't try and calculate calories from the milk jug, it doesn't work that way, because you drain off the whey which has carbs and calories in it.  And yes, I pour the whey on my houseplants and they love it.  And I'll quit posting about this for awhile, pinky swear I will.  Well, until I make frozen yogurt, but that's a whole other ballgame.  ;o)

    ~ Happy Yogurting - Jan

    Click thru the following links for more information...

    My original yogurt post from last year

    Mafter 17360 Exoglass Boullion Strainer

    YoGourmet Electric Yogurt Maker 

    And one more viewing of Paula's Video, it's worth watching again...


    Holly Clegg’s Praline French Toast with Orange Sauce

    by 👩‍🍳 Cooking With a Southern Vibe in Music City USA 👩‍🍳, December 07, 2012
    praline_edited
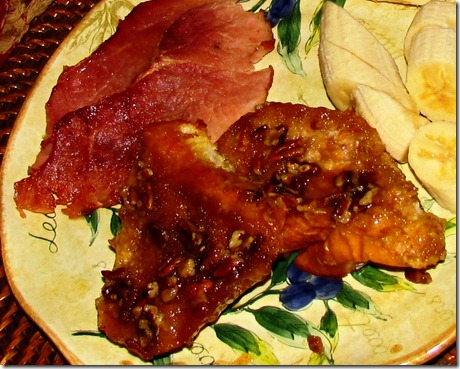
    You won’t find a better french toast recipe than this, the taste is just amazing!  it’s fluffy, crunchy, yummy, with a hint of orange, not overpowering, it’s just right.  And, it’s an overnight dish, wonderful for the holidays, and very simple to make. 

    Your friends and family will love this.  Pinky swear, they will.  ~ jan

    PRALINE FRENCH TOAST WITH ORANGE SAUCE

    6 Tbsp. unsalted butter
    1 cup light brown sugar
    2 Tbsp. white corn syrup
    1 cup chopped pecans
    2 eggs
    3 egg whites
    1 cup orange juice
    ¼ cup sugar
    1/3 cup skim milk
    1 tsp. grated orange rind
    1 tsp. vanilla extract
    ½ tsp. ground cinnamon
    1 (16 oz.) loaf French bread, cut into 12-15 (1 inch) slices

    In a large 9x13” ovenproof baking dish, melt the brown sugar, butter and corn syrup by putting it in a warm oven until everything  turns to liquid.  Then sprinkle the bottom of the dish with pecans.  The original recipe called for 1/2 cup, I used at least a cup, because I like lots of pecans, and 1/2 cup just wasn’t enough.

    In a large bowl, whisk together the eggs, egg whites, orange juice, sugar, milk, orange rind, vanilla and cinnamon. Arrange the bread slices over the mixture in the baking dish and pour the egg mixture over all.

    Cover with plastic wrap and refrigerate at least one hour or overnight. Bake in a preheated 350 degree oven for 30-35 minutes.  Serve this immediately, flip each slice when you take it out of the dish so that the praline sauce is on top.  Serve with Orange Sauce.

    ORANGE SAUCE

    ¼ cup margarine
    ¼ cup sugar
    ¼ cup orange juice
    orange zest
    2 Tbsp orange liqueur or flavoring (optional) – I omitted this
    Mix ingredients in a saucepan and bring to a boil over low heat.
    Note:  I doubled the orange sauce because I wanted everybody to have plenty.  Serve the sauce in a small pitcher so people can drizzle it on the french toast.

    Killer Cranberry Salad

    by 👩‍🍳 Cooking With a Southern Vibe in Music City USA 👩‍🍳, November 15, 2012

    killer-cranberry-jello-sala

    Sometimes a recipe comes along that is just really special.  And since Thanksgiving is just a week away, I wanted you all to see this.  It’s sooooo good, everybody that makes it loves it.  It’s my daughter-in-law Lindsay’s family recipe, I just want you all to know about it in case you’re looking for something really yummy this Thanksgiving. 

    You can click the picture to enlarge, or here is the direct link.

    I don’t use a mold, I just make it in a 9x9 pan because we like it thick.  A 9x13 works, too, whatever floats your boat.

    Enjoy ~ Jan

    Jan & Friends Thanksgiving Favorites

    by 👩‍🍳 Cooking With a Southern Vibe in Music City USA 👩‍🍳, November 02, 2012


    turkey1

    The best collection you will find anywhere of tried ‘n true Thanksgiving favorites from my girlfriends and family.  Recipes you will use again and again to create your own family traditions.

    The recipes will be available all month on Jan CAN Cook, you can access them in the sidebar, or link to them here…

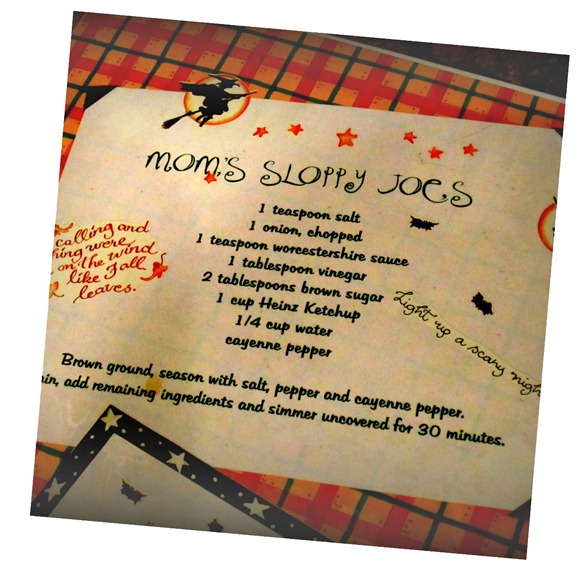
    The Best Sloppy Joes

    by 👩‍🍳 Cooking With a Southern Vibe in Music City USA 👩‍🍳, October 30, 2012

    sloppyjoes

    These are seriously the best Sloppy Joes ever!

    I’ve made this recipe since the boys were little.  My friend, Susan, a neighbor when we lived in Denver in the 80’s, gave it to me and it has remained a family favorite ever since. 

    It’s always been a Halloween tradition at our house, Sloppy Joes and Potato Chips.  We were, as all of you back in the day, in a rush to get the kids out the door to trick-or-treat, so the tradition began because it was easy and quick.

    My daughter-in-law, Deanna just posted this on her The Harris Sisters blog, and it reminded me that I needed to post it as well.  And the picture, Deanna scanned this from a cookbook I made for the boys of my recipes several years ago.

    This is so good, if you are a Sloppy Joe lover like we are at our house, give this a try and see if you don’t love it as well.  The best part, simple ingredients that you have in your cupboard and fridge…

    Enjoy ~ jan

    Cooking Cranberries….

    by 👩‍🍳 Cooking With a Southern Vibe in Music City USA 👩‍🍳, September 30, 2012

    cb

    When I cook cranberries, I always think of my friend Veronica.  She taught me how she makes them and it’s so simple. 

    A bag of cranberries (I buy multiples at Christmas and freeze them)
    1 cup Splenda
    1/8-1/4 cup water

    Simmer until they pop, then squeeze in the juice of an orange.  So easy, and so good!

    We’re having them tonight, using a bag of frozen berries from the freezer…

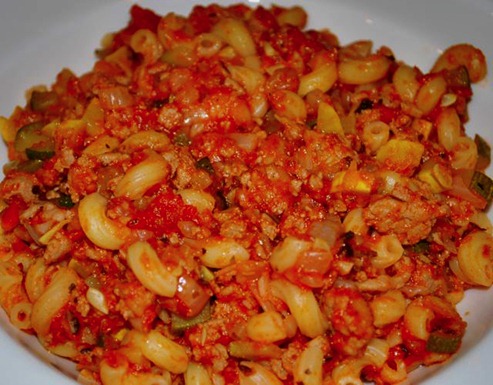
    Mom’s Goulash, simply the best!

    by 👩‍🍳 Cooking With a Southern Vibe in Music City USA 👩‍🍳, September 26, 2012

    goulash

    You have to serve this with mashed potatoes and corn, it’s just the way it’s done.  Trust me, the mashed potatoes make it wonderful.  This is so simple, a recipe from my childhood, back in the days when goulash was a staple in our diet.  It’s fast, quick, and the perfect food on a cool fall evening.

    1 lb. ground round/sirloin/chuck – whatever you want to use works
    1/2 bell pepper, finely diced
    1 onion (1/2 cup) finely diced

    Brown the above, season with salt and quite a bit of ground pepper, about 1/2 teaspoon.

    Meanwhile cook elbow macaroni or your pasta of choice to el dente, I use about a half a pound of pasta, but you can add more if you like.

    Meanwhile open a large can (28 oz.) of crushed tomatoes, put in a saucepan, add the drained meat mixture, add the drained pasta and simmer for just a few minutes.

    AND, add sugar.  I use Splenda, about 1/4 of a cup, because we like it sweet.

    That’s all there is to it, I eat it like I did as a child, with a scoop of mashed potatoes in the center of my plate and the goulash spooned over the top.

    Mother always added the corn directly in her goulash mixture, I cooked mine separately and put it on the side.

    And don’t turn your nose up at the potatoes, I know it’s two starches, but this is comfort food people, and trust me, you will be comforted after you eat this.

    Of course, real mashed potatoes are always best, but instant potatoes work, or those great Bob Evans refrigerated ones.  Just fix whatever, and enjoy, your family will love this!

    Some people add herbs and garlic to their goulash, but to me it’s best just to keep it simple with the green pepper and onions.  It’s peasant food, comfort food, warm memories, and delish!  Pinky swear it is…


    bonappetitsmall

    © Jan CAN Cook · THEME BY WATDESIGNEXPRESS