Showing posts with label Tried 'N True Hall of Fame

The World’s BEST Banana Nut Cake, SERIOUSLY!!!!

by 👩‍🍳 Cooking With a Southern Vibe in Music City USA 👩‍🍳, June 16, 2012

IMG_0080_edited

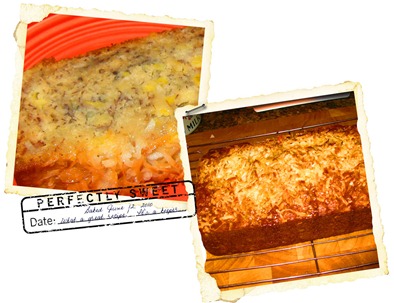
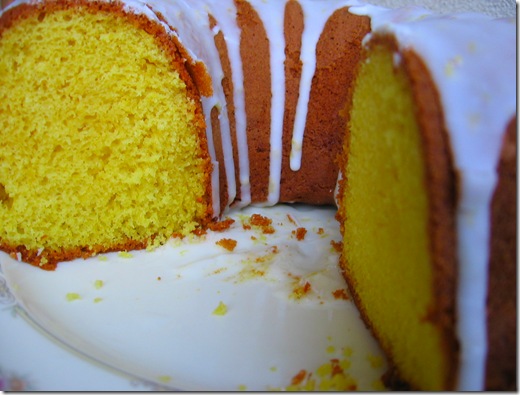
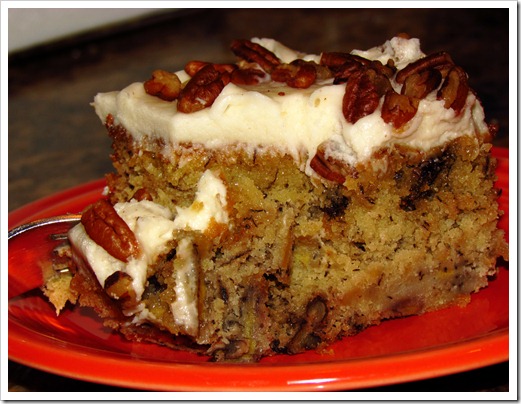
I made this last weekend when the family was home and it was a huge hit.  I found the recipe on AllRecipes and it had 1000 positive reviews.  I read all the tweaks, and ended up making the recipe pretty much like the original, except I baked it at 300°instead of 275°, and I added pecans to the batter as well.  It took about an hour and twenty minutes to bake in my oven.  This is a heavy, dense cake, reminiscent of banana nut bread, but better! I wish I would have weighed it, I would guestimate 7 lbs.  The consistency reminded me of our much loved Elsah’s Landing Hawaiian Carrot Cake, another winner that I’ve made for my family for the past twenty-five years. You can read the recipe for the Carrot Cake by clicking here.

I did put the cake immediately in the freezer for 45 minutes as the recipe told me to do, but then I frosted it, covered it and left it at room temperature so that it would moisten.  I would refrigerate this after 24 hours, since it has cream cheese in the frosting, but I think it’s best served if you bring the sliced pieces back to room temperature before serving, so that the frosting is creamy.  This cake improves with time, every day it gets more moist.

This is such a great recipe, going into my Tried ‘n True Hall of Fame it’s so good.  I did use buttermilk, some people didn’t, and I used the entire recipe for frosting as we like a lot of icing.

Ingredients

1 1/2 cups bananas, mashed, ripe
2 teaspoons lemon juice
3 cups flour
1 1/2 teaspoons baking soda
1/4 teaspoon salt
3/4 cup butter, softened
2 1/8 cups sugar
3 large eggs
2 teaspoons vanilla
1 1/2 cups buttermilk
I added a cup of chopped pecans to the batter, you can toast pecans if you like for a richer flavor

Frosting

1/2 cup butter, softened
1 (8 ounce) packages cream cheese, softened
1 teaspoon vanilla
3 1/2 cups powdered sugar, sifted
Garnish
1 cup chopped pecans

Directions:

Preheat oven to 275°. – I baked this at 300°
Grease and flour a 9 x 13 pan, I sprayed with Pam
In a small bowl, mix mashed banana with the lemon juice; set aside.  I had 5 bananas, very ripe, that’s the secret, you want your bananas turning black, they have the best flavor.  I used all of mine, I didn’t measure, I just used them.

In a medium bowl, mix flour, baking soda and salt; set aside.  I sift all of these ingredients together.

Using a mixer, cream 3/4 cup butter and 2 1/8 cups sugar until light and fluffy.

Beat in eggs, one at a time, then stir in 2 tsp vanilla.

Beat in the flour mixture alternately with the buttermilk.
Stir in banana mixture.

Pour batter into prepared pan and bake in preheated oven for one hour or until toothpick inserted in center comes out clean.  This is not long enough, even at 300° it took mine an hour and twenty minutes to bake and I have an accurate oven.

Remove from oven and place directly into the freezer for 45 minutes. This will make the cake very moist.

For the frosting, cream the butter and cream cheese until smooth.
Beat in 1 teaspoon vanilla.
Add powdered sugar and beat on low speed until combined, then on high speed until frosting is smooth.

Spread on cooled cake.

Sprinkle chopped pecans over top of the frosting, if desired, or you can mix the chopped nuts in with the cream cheese frosting. 

You’re going to love this cake, it is totally awesome.

bon-appetit-leaf

Make your own Greek Yogurt for a fraction of the cost of Fage!

by 👩‍🍳 Cooking With a Southern Vibe in Music City USA 👩‍🍳, February 29, 2012

I didn’t realize that Greek Yogurt was just yogurt with the whey extracted.  It sounds so exotic, but it’s a really simple process.  It takes no equipment, just some time and the results is wonderful!

Before I start this post, I have to give credit to Paula at Salad-in-a-Jar, I followed her techniques, and she made it so simple.

The first time is the hardest, but it’s really not that difficult, ladies.  I went to Amazon to price yogurt, 17.6 ounces of Fage Total Greek Yogurt is $6.99.

The weight of my yogurt was 18.8 ounces, and it cost me approximately $1.50 – I used a half a gallon of milk, and I paid $2.99 a gallon for the milk at Aldi’s.  Now I did have an initial investment of $1.69 for a tiny single-serve container of Fage Unflavored Yogurt, but I’m not counting that, because I will never have to buy this again, as I can save a couple of teaspoons of each batch when I make more.

To make yogurt you need a half a gallon of non-fat milk and 2 teaspoon of live yogurt culture.  Buy unflavored non-fat yogurt and look on the side of the container to make sure that it has live yogurt cultures.  I bought Fage, I’ve also heard that Dannon non-fat has live yogurt cultures, as well.

I have an 8 cup measuring bowl, so I poured 8 cups of milk into the bowl and put it in the microwave to heat to a temperature of 175-180 degrees.  This is much easier than doing it in a saucepan on the stove because you don’t have to constantly watch it.  Paula said that it took 17 minutes in her microwave, in mine it took 18 minutes, 20 seconds to reach a temperature of 175 degrees.

Big_Green_Egg_Digital_ThermometerI have a Polder Digital Thermometer which makes it really simple to tell what temperature your milk is, but a candy thermometer would work just as well. 

I started putting my thermometer into the microwave and testing at 16 minutes, I repeated this several times as I had never done this before and didn’t want it to get too hot.  The next time I do this I will know how long it takes and it will be much easier.

It looked like this when I took it out of the wave.


yoho

You need to let this sit and cool to a temperature of between 110-120 degrees, it will take about 30-45 minutes to reach this temperature.  I was anxious to get on with the process, patience is not a virtue for me, so as soon as the thermometer registered 120 degrees I was ready to proceed.  I whisked in 2 level teaspoons of the Fage Unflavored yogurt and went to the next step.

This is where it got tricky for me, I didn’t know how to keep my yogurt at 100 degrees.  I preheated my oven to 170, as low as my temperature allows, for less than a minute, and my temperature had already risen to 110 degrees, so I opened the door until it backed off to 100 degrees.  I left on my oven light, sealed my mixing bowl of yogurt with aluminum foil, wrapped it in a towel and put it in the oven to “ferment.”  Some ovens can be set to 100 degrees, if you’re one of the lucky ones that has that feature this would be much easier to regulate.

It takes anywhere from 6-12 hours to make yogurt, the longer you leave it, the more sour it gets, and I like it mild so I checked mine after 6 hours, and it wasn’t gelatinous, so I put it back into the oven and pulled it after 8 hours.  It still seemed thin, and I was pretty skeptical at this point, but I whisked it, covered it and put it in the refrigerator overnight. 

A lot of people ferment their yogurt overnight, but I made mine mid-day, as I didn’t know how to regulate the temperature.  I found that my oven stayed at a pretty consistent 105 degrees with the light on, occasionally it would start creeping up to 108 and I would panic and open the door until the temperature backed off to 100 degrees.  

This morning I took the yogurt out of the fridge, it still seemed runny, I didn’t whisk it again, I just poured it into my makeshift strainer.  You need a really fine mesh boullon strainer for yogurt, they are pricey $60 on Amazon, but you can pick them up for $30+ on eBay, but I don’t have one so I had to make my own.

I have a strainer that sits over the sink, it’s wide, so I think it takes less time to strain, I lined it with a tea towel, and then put several folded layers of paper towel on top of the towel, as I didn’t want to yogurt to touch the tea towel and let it strain.

towel

I quickly realized that I didn’t actually need the towel, I used an old one, it looked icky, so I just removed it and it worked fine to let the yogurt drain on the layers of paper towel.  You can also use cheesecloth for this, but then you have to wash it, paper towel is easier, you just toss it.

thi

You can see that the yogurt has gotten really thick, look at the difference between picture 1 and picture 2, I let it drain for almost 3 hours.

Then I put it in mother’s old stainless steel bowl, my very favorite thing in the kitchen, but you’ve all heard before about how much I love this old bowl, and you can see how thick this is.  You could slice it with a knife, it’s so thick.

gm

Then I whisked it, and it turned into this fluffy, wonderful yogurt.  Some people add a bit of skim milk at this point to make it even creamier, but I want it really thick, so I didn’t add milk back in.

www

I’m going to have a scoop of this on a baked potato tonight with some fresh chives from my garden.  Oh so good!

j

I put it in my Ball jar and the finished product yielded a little over two cups.  I’m amazed by the fact that it reduces so much, but you’re taking out all of the liquid (whey) which some people use for different things, they use it instead of water for cookies veggies, for homemade bread, some people even water houseplants with it.

d

And here’s the weight, you’re probably thinking “this is a lot of work,” but it seriously isn’t, once you figure out how to do this, it’s going to be really simple.

scz

If you’re interested in this, Paula has a video, explaining it all.  You can access it here.

Note:  Some recipes called for powdered milk to give added protein and make it richer.  I was going to put it in, but I noticed a notation on salad-in-a-jar website that said she no longer does this, as she likes the texture better without it, so I left it out.

It’s healthy, it’s good for your gut, it’s cheap, it’s totally natural, it’s Yogurt!!!!!!!

Awesome granola bars, and SO easy….

by 👩‍🍳 Cooking With a Southern Vibe in Music City USA 👩‍🍳, February 04, 2012

gr

I made these granola bars a few days ago, and it literally took me 5 minutes.  Using condensed milk really simplifies this recipe and the results are excellent.

I omitted the butter, and instead of putting them in a pan, I patted them out into a rectangle on my SiloPat baking sheet, baked them for 20 minutes, and they turned out perfect.

Ingredients

    3 heaping cups quick oats old fashioned oats
    1 (14 ounce) can sweetened condensed milk
   2 tablespoons butter, melted
    1 cup flaked coconut
    1 cup sliced almonds
    1 cup miniature semisweet chocolate chips
    1/2 cup sweetened dried cranberries (I used raisins instead)

Directions

    Preheat oven to 350 degrees F (175 degrees C). Grease a 9x13 inch pan.
    In a large bowl, mix together the oats, sweetened condensed milk, butter, coconut, almonds, chocolate chips and cranberries with your hands until well blended. Press flat into the prepared pan.
    Bake for 20 to 25 minutes in the preheated oven, depending on how crunchy you want them. Lightly browned just around the edges will give you moist, chewy bars. Let cool for 5 minutes, cut into squares then let cool completely before serving.

Adapted from a recipe by Allrecipes.com

World’s BEST Corn Chowder

by 👩‍🍳 Cooking With a Southern Vibe in Music City USA 👩‍🍳, January 22, 2012

asoup

I make the most amazing corn chowder, it’s adapted from an old Betty Crocker Cookbook from the 70’s.  It’s a big recipe, I never cut it down, leftovers are great, and you can give it to family and friends, it reheats beautifully, too.

5 large potatoes, cubed and cooked in salted water (do not overcook, this will only take about 10-15 minutes for them to cook).
8 cups milk (part half and half is awesome, whole milk is good, 2% milk is acceptable, but skim milk is not rich enough)
1 large onion,diced
1 lb. bacon
3/4 cup flour
2 cans cream style corn
1 bag frozen corn
shredded cheese, chopped scallions and crumbled bacon for garnish

While potatoes are cooking, saute bacon in large skillet.  Remove when crisp, drain on paper towels and crumble.

Put onions in bacon drippings and cook until tender.  Remove onions with slotted spoon and put 3/4 cup flour into drippings, stirring constantly.  I usually take this off the burner, as it thickens really quickly.  Then I stir in 2-3 cups of the milk, and put it back on the burner for a minute or so, whisking constantly.  Meanwhile put the remaining milk in the microwave and nuke it until it’s warm.  If you put cold milk into warm drippings, it can curdle, so always warm everything.  I warm the bag of frozen corn as well.

Put the 2 cans of cream style corn, the bag of warmed frozen corn in a large stockpot, add the onions, drain the cooked potatoes, add them, and I use a strainer to add the flour mixture to the ingredients in the crockpot, as you don’t want any lumps from the flour.  Add salt and pepper to taste, I usually add 1-2 teaspoons of salt and a teaspoon of pepper.  Heat until thick, but not boiling.

I served it with this great cornbread, quick and easy and delicious.

Bon-Appeti

Note:  The drippings from a pound of bacon is not too much, don’t decrease the amount of bacon grease, this is a really big recipe, and you need that much to flavor it.  I sometimes add 2-3 tablespoons of butter as well, if I’m making it with 2% milk to give it a richer flavor.

Amazing Black Eyed Peas for New Years

by 👩‍🍳 Cooking With a Southern Vibe in Music City USA 👩‍🍳, December 31, 2011
If you’re one of those people who makes black-eyed peas on New Years Day, I have a wonderful recipe for you.  My neighbor, the one with the fantastic German Potato Salad recipe, makes these every year, and it’s a fabulous dish!

2 cans black-eyed peas, I drain and rinse for a more subtle flavor
2 cans italian stewed tomatoes
1 lb. sweet italian sausage, with casing removed
1 large onion
2 tablespoons of italian seasoning
1 teaspoon of oregano, if desired

Brown onion and sausage, drain, crumble and dump all in a crockpot, simmer on high for 3-4 hours, meanwhile cook a cup or so of pasta, any small pasta will work and stir it in at the end. 
This is so good, and so easy….

Enjoy and Happy New Year

~ jan

Hot Buttered Rum

by 👩‍🍳 Cooking With a Southern Vibe in Music City USA 👩‍🍳, November 20, 2011

Much better than a hot toddy, my friend Carlene swears by this recipe...

1-2 teaspoons of brown sugar

1 Tablespoon of vanilla ice cream

Mix together and put in a mug of hot water, add a jigger or more of rum, a pat of butter on top and a cinnamon stick to stir with.

Enjoy and feel better soon ;o)


Barb’s Amazing Creole Burgers

by 👩‍🍳 Cooking With a Southern Vibe in Music City USA 👩‍🍳, November 13, 2011

creole

My friend, Barb was telling me earlier this week about Creole Burgers.  When she was a little girl there was a local drive-in called the Sani-Cream and they served these burgers.  When they closed, the owner gave her dad the recipe, and her family has made them ever since.

You all know about how crazy we are about my Sloppy Joes, and the Creole Burgers are, for me, a new twist on an old favorite.  I thought they were amazing, and I’ll make them again and again.  She couldn’t remember exactly how much ketchup and mustard to use, she just tastes it and knows when it’s right.  Since I had nothing to gauge them by, I found a recipe online, altered it a bit, and think it’s really close to what she makes.  Hope you all enjoy these as much as we do.

~ jan

1 lb. ground beef
1 onion, chopped
1 can of Campbell’s Chicken Gumbo Soup
4-5 tablespoons Heinz Ketchup
3 tablespoons mustard, I use Plochmann’s because it’s my favorite
2-3 tablespoons Worcestershire sauce
1/2 teaspoon of pepper
salt to taste

Brown hamburger and onions breaking it up and crumble as it cooks, drain, add soup and condiments and simmer 15-20 minutes.  It thickens as it cooks.

So easy, and SO good!

Note:  I added salt very sparingly as the soup gives you a salty base to begin with, next time I think I will sprinkle the hamburger with Tony Chachere’s Creole Seasoning when I brown it.

Miss Daisy’s Frozen Cherry Salad

by 👩‍🍳 Cooking With a Southern Vibe in Music City USA 👩‍🍳, September 04, 2011

missdaisy

Miss Daisy’s Tea Room was a famous Franklin Tennessee institution in the 80’s.  Hubby took me, it was so much fun, and the food was wonderful.  I bought her cookbooks, used them a few times, put them away and went on to other things.

John and Deanna also live in Franklin and last week they ate at Marcia’s Patisserie in historic downtown Franklin.  Deanna had frozen cherry salad and loved it.

When she told me about it, I remembered my Miss Daisy Cookbooks and since I’m a cherry lover as well, I vaguely remembered that she had a recipe in her cookbook for Frozen Cherry Salad.  They’re here for the weekend, and this afternoon I got out her cookbooks, and sure enough, there was the recipe and it’s exactly the same thing as Deanna got at Marcia’s.

So here it is for all of you, and it’s wonderful.  Enjoy!!!  ~ jan

Miss Daisy’s Frozen Cherry Salad

1-l6. oz can cherry pie filling

1-14 oz. can crushed pineapple

1-14 oz. can Eagle Brand condensed milk

1-13 oz. can Cool Whip

Chopped Pecans, optional

Mix all ingredients and freeze in either a loaf pan or a 9 x 13 pan.  Cut in squares and garnish with Party Salad Topping and a strawberry.

This is the original recipe that calls for the party salad topping so I’ll include it, even though she didn’t have it on hers.

Party Salad Topping

4-1/2 oz. Cool Whip
1/4 cup salad dressing (I assume this is Miracle Whip, not mayo)
1/4 cup instant breakfast drink (Tang maybe)

Mix well and refrigerate until serving time.

Lemon Cookies from a Cake Mix–Absolutely YUMMY!!!!!!

by 👩‍🍳 Cooking With a Southern Vibe in Music City USA 👩‍🍳, August 04, 2011

cookiefinal

This great little cookie couldn’t be easier.  It tastes just like lemon bars, I’m sure it could be baked in a 9 x 13 pan if you don’t want to bother with making cookies.  It’s a keeper recipe, you can stir these up in five minutes.

~ jan


Ingredients

1 (18.25 ounce) package lemon cake mix
2 eggs
1/3 cup vegetable oil
1 teaspoon lemon extract
zest and juice from one lemon
1/3 cup confectioners' sugar for decoration

Directions

Preheat oven to 375 degrees F (190 degrees C).

Pour cake mix into a large bowl. Stir in eggs, oil, zest, juice and lemon extract until well blended. Drop small cookie scopps of dough into a bowl of confectioners' sugar. Roll them around until they're lightly covered. Once sugared, put them on an ungreased cookie sheet.

Bake for 10 to 12 minutes in the preheated oven. The bottoms will be light brown, and the insides chewy.

While they are cooling, put additional powdered sugar in a small colander or sifter and dust the tops again…

The World’s Best German Potato Salad

by 👩‍🍳 Cooking With a Southern Vibe in Music City USA 👩‍🍳, May 27, 2011
ap1
My neighbor, a German lady who is ninety-three years young, and the most wonderful cook, gave me, with a twinkle in her eye, I might add, her recipe for German Potato Salad.  She’s made it for the past seventy years, always to rave reviews, and is very different in others I’ve tried in the past, as she uses equal proportions of sugar, water, and vinegar.  Most recipes just use a few tablespoons of sugar at the most, she uses a whole cup, but trust me, it isn’t too much.  I also made this using Splenda instead of sugar with great results, but I would suggest the first time, you make it fully leaded.

I know, we all tweak our recipes, but please, don’t change a thing, make this exactly like the recipe and your family will love you forever!  It’s good warm, but better if you make it ahead and let it set at room temperature for a couple of hours.  It’s also great cold.  Oh, what an amazing recipe this is.

~ jan

LeeAnn’s Amazing Potato Salad
4-6 red skinned potatoes, leave the peeling on
1 large onion, diced
1/2 red or orange pepper diced
1/2 green pepper diced
4 hardboiled eggs
6 slices of bacon, diced (cut into small dice, then cut in half vertically so that you have really small pieces)
salt and pepper to taste

1 heaping tablespoon flour
1 cup apple cider vinegar
1 cup water
1 cup sugar

Steam potatoes until tender.  Cook hardboiled eggs.

Saute diced bacon until crisp and remove with slotted spoon.  Saute onion, red and green pepper in bacon drippings until limp and tender.  Add heaping tablespoon of flour and stir until incorporated into the drippings.  Add water, sugar and vinegar and cook for several minutes until it thickens slightly. (Mixture won’t be thick, it will be slightly runny).  Taste and correct with salt and pepper to taste, I use probably an additional 1/2 teaspoon of salt and a teaspoon of freshly ground pepper.

Slice potatoes thinly, then cut in half so they are smaller bites (I don’t remove the skin) and chop eggs.
In 9x13 pan or large casserole dish, spread out potatoes, then sprinkle eggs on top of the potatoes, then sprinkle the reserved bacon on top and pour the bacon drippings, peppers, onions, water sugar and vinegar over the potato mixture.  Let it sit for a bit for the flavors to marry.  This is great warm, at room temperature, or cold.

Old Fashioned Raisin Pie

by 👩‍🍳 Cooking With a Southern Vibe in Music City USA 👩‍🍳, February 07, 2011

pie

This is the recipe Mother always used, on the back of the Sun-Maid raisin box, and yes, it was as good as it looks.   ~ jan

A country fair winning recipe from years ago.

Ingredients

2 cups Sun-Maid Natural Raisins
2 cups water
1/2 cup packed brown sugar
2 tablespoons cornstarch
1/2 teaspoon cinnamon
1/4 teaspoon salt
1 tablespoon vinegar
1 tablespoon butter

1 double unbaked pie crust

Directions:

COMBINE raisins and water and boil for 5 minutes.
BLEND sugar, cornstarch, cinnamon and salt.
ADD to raisin liquid and cook, stirring until clear.
REMOVE from heat.
STIR in vinegar and butter. Cool slightly. Turn into pastry-lined pan.
COVER with top pastry or lattice strips.
BAKE at 425 F about 30 minutes or until crust is golden brown.

Makes 1 pie (8 servings).

Here are my tweaks:

Raisin pie tends to be runny, especially when it’s warm, and we all know it’s best when it’s warm, so I increased the cornstarch to 3 tablespoons.

I had a bag of assorted raisins, some were really large golden raisins, and it also contained regular dark raisins and regular size golden raisins.  This was fantastic!  The combination of raisins really enhanced the flavor. 

This pie was so good, seriously the best raisin pie I’ve ever eaten.  It was so good that I tagged it and it’s going in the Tried ‘n True Hall of Fame in the sidebar.

~jan

Gigi’s Chocolate Salted Caramel Cupcakes

by 👩‍🍳 Cooking With a Southern Vibe in Music City USA 👩‍🍳, January 04, 2011
chocolatesaltedcaramel
When we were in Nashville for Christmas, we stopped by Gigi’s Cupcake Shop.  The family tried different flavors, Wedding Cake, Italian Crème, Kentucky Bourbon, but I decided on this Chocolate Salted Caramel one.  Ladies, I kid you not, this was hands down, the best cupcake I’ve ever put in my mouth.

I’ve searched the net looking for a similar recipe, and  put a few together to come up with my own very similar version.  I simplified it a bit by using a dark chocolate cake mix, after all, it’s not about the cake anyway, it’s all about the toppings, and Betty Crocker happens to be a great cook.  This recipe is labor intensive enough, make it easy on yourself and just use a mix for the cupcakes.

~ jan

Betty Crocker Dark Chocolate Cake mix, made as per directions on box in lined cupcake pans.

Caramel Filling for Cupcakes:

2-1.2 cups sugar
2.3 cup water
1 tablespoon light corn syrup
3/4 cup heavy whipping cream
2.5 teaspoons sea salt

Directions:

Heat sugar, water and corn syrup in heavy saucepan over medium high heat, stirring occasionally until syrup is clear.  Then clip a candy thermometer to the side of the pan.

Now cook without stirring until it comes to a boil, washing down sides of pan with a wet pastry brush as needed.  Boil, gently swirling pan occasionally, until mixture is carmelized and reaches 360 degrees.

Remove from heat, slowly pour in cream, stirring with a wooden spoon until smooth.  Stir in sea salt.

Take a knife, cut a cone-shaped piece (about 1/2 inch deep) from the center of each cupcake and discard the cut out piece.  Spoon 1-2 teaspoons of warm Salted Caramel Filling into each hollowed-out cupcake.  The caramel will sink into the cupcake, go back and fill with a bit more.  Sprinkle a pinch of sea salt over filling.

Caramel Buttercream Frosting:

1/4 cup sugar
2 Tbsp. water
1/4 cup heavy cream
1  1/2 tsp. vanilla
3/4 cup (1.5 sticks) salted butter, room temperature
2 1/2 cups powdered sugar

Briefly stir together granulated sugar and water in a small saucepan and bring to a boil over medium-high heat and continue to cook without stirring until mixture turns dark amber, this should take six or seven minutes.

Remove from heat and slowly add in cream and vanilla.  Beat with a wooden spoon until completely smooth and let cool.

Beat the butter on medium-high speed until light in color and fluffy, about 3 minutes. Reduce speed and add powdered sugar. Mix until well combined. Turn off the mixer, and slowly add caramel. Beat frosting on low to combine, and then increase to medium-high and beat until airy and thoroughly mixed, about 2 minutes.

These cupcakes look best when piped through a bag.  Use a swirl (1M tip).  If you pipe the cupcakes, it takes a lot more frosting, but that’s what makes them special, so double your recipe and pile them really high with the frosting.

For the finish -

Chocolate Ganache

9 ounces bittersweet chocolate, chopped
1 cup heavy cream
1 tablespoon dark rum (optional)

Directions

Place the chocolate into a medium bowl. Heat the cream in a small sauce pan over medium heat. Bring just to a boil, watching very carefully because if it boils for a few seconds, it will boil out of the pot. When the cream has come to a boil, pour over the chopped chocolate, and whisk until smooth. Stir in the rum if desired.

Allow the ganache to cool slightly before pouring over a cake. Start at the center of the cake and work outward. For a fluffy frosting or chocolate filling, allow it to cool until thick, then whip with a whisk until light and fluffy.

Frost the top of the buttercream topped cupcakes with the Ganache, as shown in photograph, and top with a smattering of sea salt. 

And there you have it, absolute, total perfection.  Not hard to make, just time consuming, and always more fun if made with a girlfriend.

Totally different, totally decadent, completely addictive cupcakes, what more could you ask for…

Silver Palate Molasses Cookies

by 👩‍🍳 Cooking With a Southern Vibe in Music City USA 👩‍🍳, October 03, 2010

moBadass ginger molasses cookies photo from jellypress.com
Nancy Gail Ring copyright 2010. All rights reserved."

When John and Ryan were little boys, I baked these cookies a lot.  They were one of our favorites, and I sometimes substituted sorghum if I didn’t have molasses.  If you like a moist, chewy, spicy cookie, this one is awesome.  So good that they’re going in the Tried ‘n True Hall of Fame, as well as the cookie category.

I didn’t have a photo of these cookies, but the ladies at Jellypress allowed me to use theirs.  They are using a different recipe, but the cookies look very similar to mine.

Try a batch, your family will love them, pinkie swear!

~ jan

Silver Palate Molasses Cookies

Ingredients:

12 tablespoons unsalted butter
1 cup granulated sugar
1/4 cup molasses
1 eggs
1 3/4 cups all-purpose flour
1/2 teaspoon ground cloves
1/2 teaspoon ground ginger
1 teaspoon ground cinnamon
1/2 teaspoon salt
1/2 teaspoon baking soda

Directions:

Preheat your oven to 350 degrees.

Melt butter; add sugar and molasses, and mix thoroughly. Lightly beat egg and add to butter mixture, blend well. Sift flour with spices, salt and baking soda, and add to first mixture; mix. Batter will be wet. Lay a sheet of foil on a cookie sheet. Drop tablespoons of cookie batter on foil, leaving 3 inches between the cookies. These will spread during baking. Bake at 350 degrees until cookies start to darken, about 8-10 minutes. Remove from oven while still soft. Let cookies cool on foil, but remove foil from cookie sheet. Makes 24 very large flat cookies. These soft, chewy, spicy cookies will stay moist, in an airtight tin, for at least a week.

Note - It is easy to overbake these cookies. Remove them from the oven earlier than you think.

We didn’t have non-stick foil when this recipe was printed, but it would work great.

Source:  Silver Palate Cookbook

Check out Jellypress – Old Recipes Modern Life, it’s a bookmarker, ladies.  Very visual and arty, these ladies did a great job!

The Chewy, Alton Brown’s Amazing Chocolate Chip Cookies!

by 👩‍🍳 Cooking With a Southern Vibe in Music City USA 👩‍🍳, September 21, 2010

4

This is it, the chocolate chip cookie that I’ve been searching forever for.  They are so good, thick and chewy, not flat and thin like most chocolate chip cookies.

I’ve tried so many recipes, tried to fiddle with The Original Toll House Cookie recipe, too, by adding more flour, and could never get it right.  These are hands down, the best chocolate chip cookies I’ve ever made.  I’ll never try another recipe, I’ve found perfection!

I made these because of 750 positive comments on the Food Network site, and I was thrilled with the results.  It’s the bread flour, I believe, that makes them puffy not flat.  If you never make anything from my site, and you’re a chocolate chip cookie lover, than make these.  You will not be disappointed, pinkie swear you won’t!

The only adaptation I made was not using parchment paper.  I baked them on a cushioned,  air cookie sheet, it worked perfectly.

I chilled them for a half an hour, then scooped them into big balls with an ice cream scoop, the rest I baked off the next day after being in the refrigerator all night. 

~ jan

Ingredients

    * 2 sticks unsalted butter
    * 2 1/4 cups bread flour
    * 1 teaspoon kosher salt
    * 1 teaspoon baking soda
    * 1/4 cup sugar
    * 1 1/4 cups brown sugar
    * 1 egg
    * 1 egg yolk
    * 2 tablespoons milk
    * 1 1/2 teaspoons vanilla extract
    * 2 cups semisweet chocolate chips

Hardware:

    * Ice cream scooper (#20 disher, to be exact)
    * Parchment paper
    * Baking sheets
    * Mixer

Directions

Heat oven to 375 degrees F.

Melt the butter in a heavy-bottom medium saucepan over low heat. Sift together the flour, salt, and baking soda and set aside.

Pour the melted butter in the mixer's work bowl. Add the sugar and brown sugar. Cream the butter and sugars on medium speed. Add the egg, yolk, 2 tablespoons milk and vanilla extract and mix until well combined. Slowly incorporate the flour mixture until thoroughly combined. Stir in the chocolate chips.

Chill the dough, then scoop onto parchment-lined baking sheets, 6 cookies per sheet. Bake for 14 minutes or until golden brown, checking the cookies after 5 minutes. Rotate the baking sheet for even browning. Cool completely and store in an airtight container.

Source:  Food Network

Coconut Banana Bread with Lime Glaze

by 👩‍🍳 Cooking With a Southern Vibe in Music City USA 👩‍🍳, June 14, 2010
6.14.12  Carlene gave me this recipe, she thinks it tastes like Juicy Fruit Gum.  I made it this weekend, it’s a winner,  ladies.  You won’t believe how moist this bread is, and there is only 4 tablespoons of butter in it!  It’s going into the Tried ‘n True Hall of fame it’s so good.  If you can let it sit for a couple of days, it gets so moist it’s soggy.  Oh, is this a yummy summer dessert bread!  Both of us tweaked the recipe, of course, changes follow the recipe… ~ jan

adapted by Our Best Bites from Cooking Light and further adapted by Jan and Carlene

2 C flour
3/4 tsp baking soda
1/2 tsp salt
1 C sugar
1/4 C (4 Tbs) real butter, softened
2 large eggs
1 1/2 C mashed ripe bananas (about 4 large bananas)
1/4 C sour cream or plain yogurt
3 Tbs apple juice or milk*
1 tsp vanilla extract
1/2 C coconut

Topping: 2 Tbs additional coconut

Glaze: 1/2 C powdered sugar whisked with 1 1/2 Tbs fresh lime juice
*as in: don't go buy apple juice just for this recipe.  If you don't already have some, just use milk!

Preheat oven to 350 degrees.

Whisk flour, baking soda, and salt together and set aside.
In a large mixing bowl, beat butter and sugar until blended.  Add eggs and beat to combine.  Add banana, sour cream or yogurt, apple juice (or milk), and vanilla.  Beat until blended.

Add flour mixture and beat at a low speed until just combined.  Stir in 1/2 C coconut.
Pour batter into a 9x5" loaf pan that has been sprayed with non-stick spray.  Sprinkle additional 2 Tbs coconut on top. 

Bake in the oven for about 1 hour or until a knife or skewer inserted in center comes out clean. Note: Check bread after about 40 minutes.  If the top has browned and the coconut pieces are looking toasty, cover top of bread lightly with a piece of foil.  Continue baking until done.

When done, remove pan from oven.  Let cool on a cooling rack for about 10 minutes and then carefully remove from pan.  Whisk powdered sugar and lime juice together for the glaze and then drizzle over top.    Cool for another 15 minutes before slicing.
Carlene’s tweaks:  If you use a glass pan, add 10-15 miutes to baking time.  She also used greek style pineapple yogurt instead of the sour cream or plain yogurt, and she added coconut flavoring extract and vanilla.  She also used 3 tablespoons of coconut milk and 1 tablespoon of fat free half and half.  She added lost of lime zest along with the juice in the icing….
Jan’s tweaks:  I baked this in an insulated metal pan, and it took quite a bit longer than an hour to bake.  I still underbaked a bit, I like my breads that way.  I tented the bread with foil with holes poked in it after an hour, as the coconut on top was starting to get golden and I didn’t want it to burn.  I used light sour cream instead of the pineapple or greek yogurt.  I used 3 heaping Tablespoons of Thai unsweetened coconut milk (in the Asian section of the supermarket, this is really thick like condensed milk. Make sure you buy the unsweetened, and I used the full fat, not the light version).  Oh, and the most important change, I added a small can of crushed pineapple to the batter, well drained and blotted with paper towel.  I love anything banana/pineapple, and this was a great addition to the original recipe.
I used RealLime concentrate in the glaze.  Omg, I bet Carlene is rolling her eyes, ;o).  It worked great, though…  Fresh lime and zest would have been better I’m sure, but I used all my limes in the ginger beer and didn’t want to go back to the store.
My bananas were extremely ripe.  So ripe that they were black on the outside, but it helped give this such a moist texture, I think.

Chocolate Easter Bunny Pie

by 👩‍🍳 Cooking With a Southern Vibe in Music City USA 👩‍🍳, March 21, 2010

The-Real-Easter-Bunny--39173_cr

Nisha gave me this recipe, it’s  really popular with her sorority sisters, rich, creamy and easy to make.  I thought some of you might enjoy it, too.  ~ jan

6 oz. chocolate bunny
18 large marshmallows halved or 180 mini marshmallows
1/4 cup milk
16 oz. unsweetened whipping cream
1 prepared graham pie shell
small piece of bunny to shave on top of pie and/or mini chocolate bunnies for the top

Melt bunny in milk, then stir in marshmallows stirring constantly until they melt.  Cool completely, whip cream until stiff, fold into cooled chocolate mixture, pour into crust and chill until firm - 2-3 hours.  Decorate with shaved chocolate and bunnies.

Lemon Cake Supreme

by 👩‍🍳 Cooking With a Southern Vibe in Music City USA 👩‍🍳, March 12, 2010
cake
This recipe dates back to the 60’s, and it’s still absolutely fantastic!
~ jan
1 box Duncan Hines lemon cake mix
1 small box instant lemon pudding
1/2 cup powdered milk
1/3 cup sugar
1/2 cup lemon juice
1/2 cup water
1/2 cup oil
5 large eggs
Glaze:
2 cups powdered sugar
1/3 cup butter, melted
3-4 tablespoons lemon juice
Mix all dry ingredients together. Stir in water and lemon juice. Beat in one egg at a time, and then beat entire mixture for 2 minutes. Pour into bundt pan and bake at 325 degrees for 50-60 minutes.
When cool, drizzle glaze over cake.
To Make Glaze:
Place 2 cups powdered sugar in medium mixing bowl. Whisk in melted butter and lemon juice.  If it’s too thick, thin it with a tablespoon or so of hot water.

Drizzle over cake and cool.

Nick And Toni's Penne alla Vecchia Bettola from The BareFoot Contessa

by 👩‍🍳 Cooking With a Southern Vibe in Music City USA 👩‍🍳, February 28, 2010
http://frogandprincess.files.wordpress.com/2010/01/nick_02.jpgThis recipe is from Nick & Toni's, a popular restaurant in the Hamptons. It's their signature dish, obtained while traveling in Italy twenty years ago, and served in the restaurant ever since.


1/4 cup good olive oil
1 medium Spanish onion, diced
1/2 tablespoon crushed red pepper flakes
1 1/2 tablespoons dried oregano
1 cup vodka
2 (28-ounce) cans peeled plum tomatoes (Cento's San Marzano)
Kosher salt
1 pound penne pasta
2 cups heavy cream
4 tablespoons fresh oregano, chopped
Grated Parmesan cheese


Preheat the oven to 375 degrees F.

Heat the olive oil in a large saute pan over
medium heat, add the onions and garlic and cook for about 10 minutes
until translucent. Add the red pepper flakes, dried oregano and vodka,
and continue cooking until the mixture is reduced by half.

Meanwhile, drain the tomatoes through a sieve,
crush them with your hands, and place them in a 5 quart ovenproof pot
or Dutch oven. Add the onions to the tomatoes and cover with a tight
lid. Place the pot in the oven and cook for 1 1/2 hours. Remove the
pot from the oven and let cool for 15 minutes.

Meanwhile, bring a large pot of salted water
to a boil and cook the pasta according to package directions. Set
aside.

Place the tomato mixture in a blender and
puree in batches until the sauce is a smooth consistency, and return to
the pot.

Reheat the tomato sauce and add the heavy
cream, fresh oregano and salt, to taste, and simmer for 5 minutes. Toss
the sauce with the pasta and sprinkle with Parmesan cheese, to taste.
Serve.

Source:  The Barefoot Contessa


Baked Caramel Corn

by 👩‍🍳 Cooking With a Southern Vibe in Music City USA 👩‍🍳, November 03, 2009


cc 

This is one of our family’s favorite recipes.  I make it often when I visit the kids, everybody loves this.  It’s an old recipe, I remember my Aunt Idalene making it when I was just a little girl.  It so easy to make, just be careful when you pour in the baking soda; it foams, and this stuff is hot!

~ Jan

  • 24 cups popped yellow popcorn
  • Nonstick cooking spray
  • 1 cup butter or margarine
  • 2 cups firmly-packed brown sugar
  • 1/2 cup light corn syrup
  • 1 tsp. salt
  • 1/2 tsp. baking soda
  • 1 tsp. vanilla

Here's How:
Preheat oven to 250F. Coat the bottom and sides of a large roasting pan with nonstick cooking spray. Place popped popcorn in roasting pan. Salt the popcorn lightly.  I cook the popcorn in an air popper, so I don’t have additional oil.

In a heavy pan, slowly melt butter; stir in brown sugar, corn syrup and salt. Heat to a boil, stirring constantly; boil on medium low heat without stirring for 5 minutes. Remove from heat; stir in baking soda and vanilla. Gradually pour over popped popcorn, mixing well. Bake for 1 hour, on the bottom rack of your oven, stirring every 15 minutes. Remove from oven, cool completely. Break apart and store in tightly-covered container.

Yield: about 6 quarts

Notes:  The secret to this caramel corn is to stir it often when it’s baking, because the caramel topping melts and runs to the bottom of the pan.  If you don’t keep stirring, it just puddles at the bottom.

When you take it out of the oven, immediately put it on sheets of waxed paper that you’ve put on your countertop.  Then let it cool for just a bit and break apart.  If you leave it in the roaster pan, it will stick to the bottom and you will have a mess.

Also immediately immerse your roaster pan in water for easy cleanup.  Do the same as soon as you empty your saucepan of the caramel syrup, or you will have a sticky gooey mess to deal with.

Mom’s Sloppy Joes

by 👩‍🍳 Cooking With a Southern Vibe in Music City USA 👩‍🍳, October 30, 2009

sloppy-joes

I’ve made this recipe for Sloppy Joes for thirty+ years now.  It’s just the BEST! It’s our Halloween favorite, and an annual tradition with our family; Sloppy Joes and potato chips every Halloween evening.  It’s one of the classic recipes that you just don’t mess with.  It’s perfect just the way it is…

~ jan

1 lb. ground beef
1 onion, chopped
1 teaspoon Worcestershire sauce
1 teaspoon salt
1 Tablespoon white vinegar
2 heaping Tablespoons brown sugar
1 Cup Heinz Ketchup
1/4 cup water (if you double the recipe, don't double the water, just use 1/4 cup, it's perfect)
Cayenne Pepper to taste

Brown meat and onion, season with salt, pepper and cayenne pepper.

Drain, add remaining ingredients and simmer uncovered for 30 minutes.  If mixture gets too thick, add a bit more water. 

Note:  I usually double this recipe.  When the boys were little, they loved Velveeta Cheese melted on the top of the sloppy joes.  I would put the joes on the bun, top with the cheese, leave the top bun off, and nuke it until the cheese melted.  Velveeta is so “not cool” these days, but for some things it will always be the best!

© Jan CAN Cook · THEME BY WATDESIGNEXPRESS